Creating a project
Create an assessment project, what each addition buys you, and how to read the result screen.
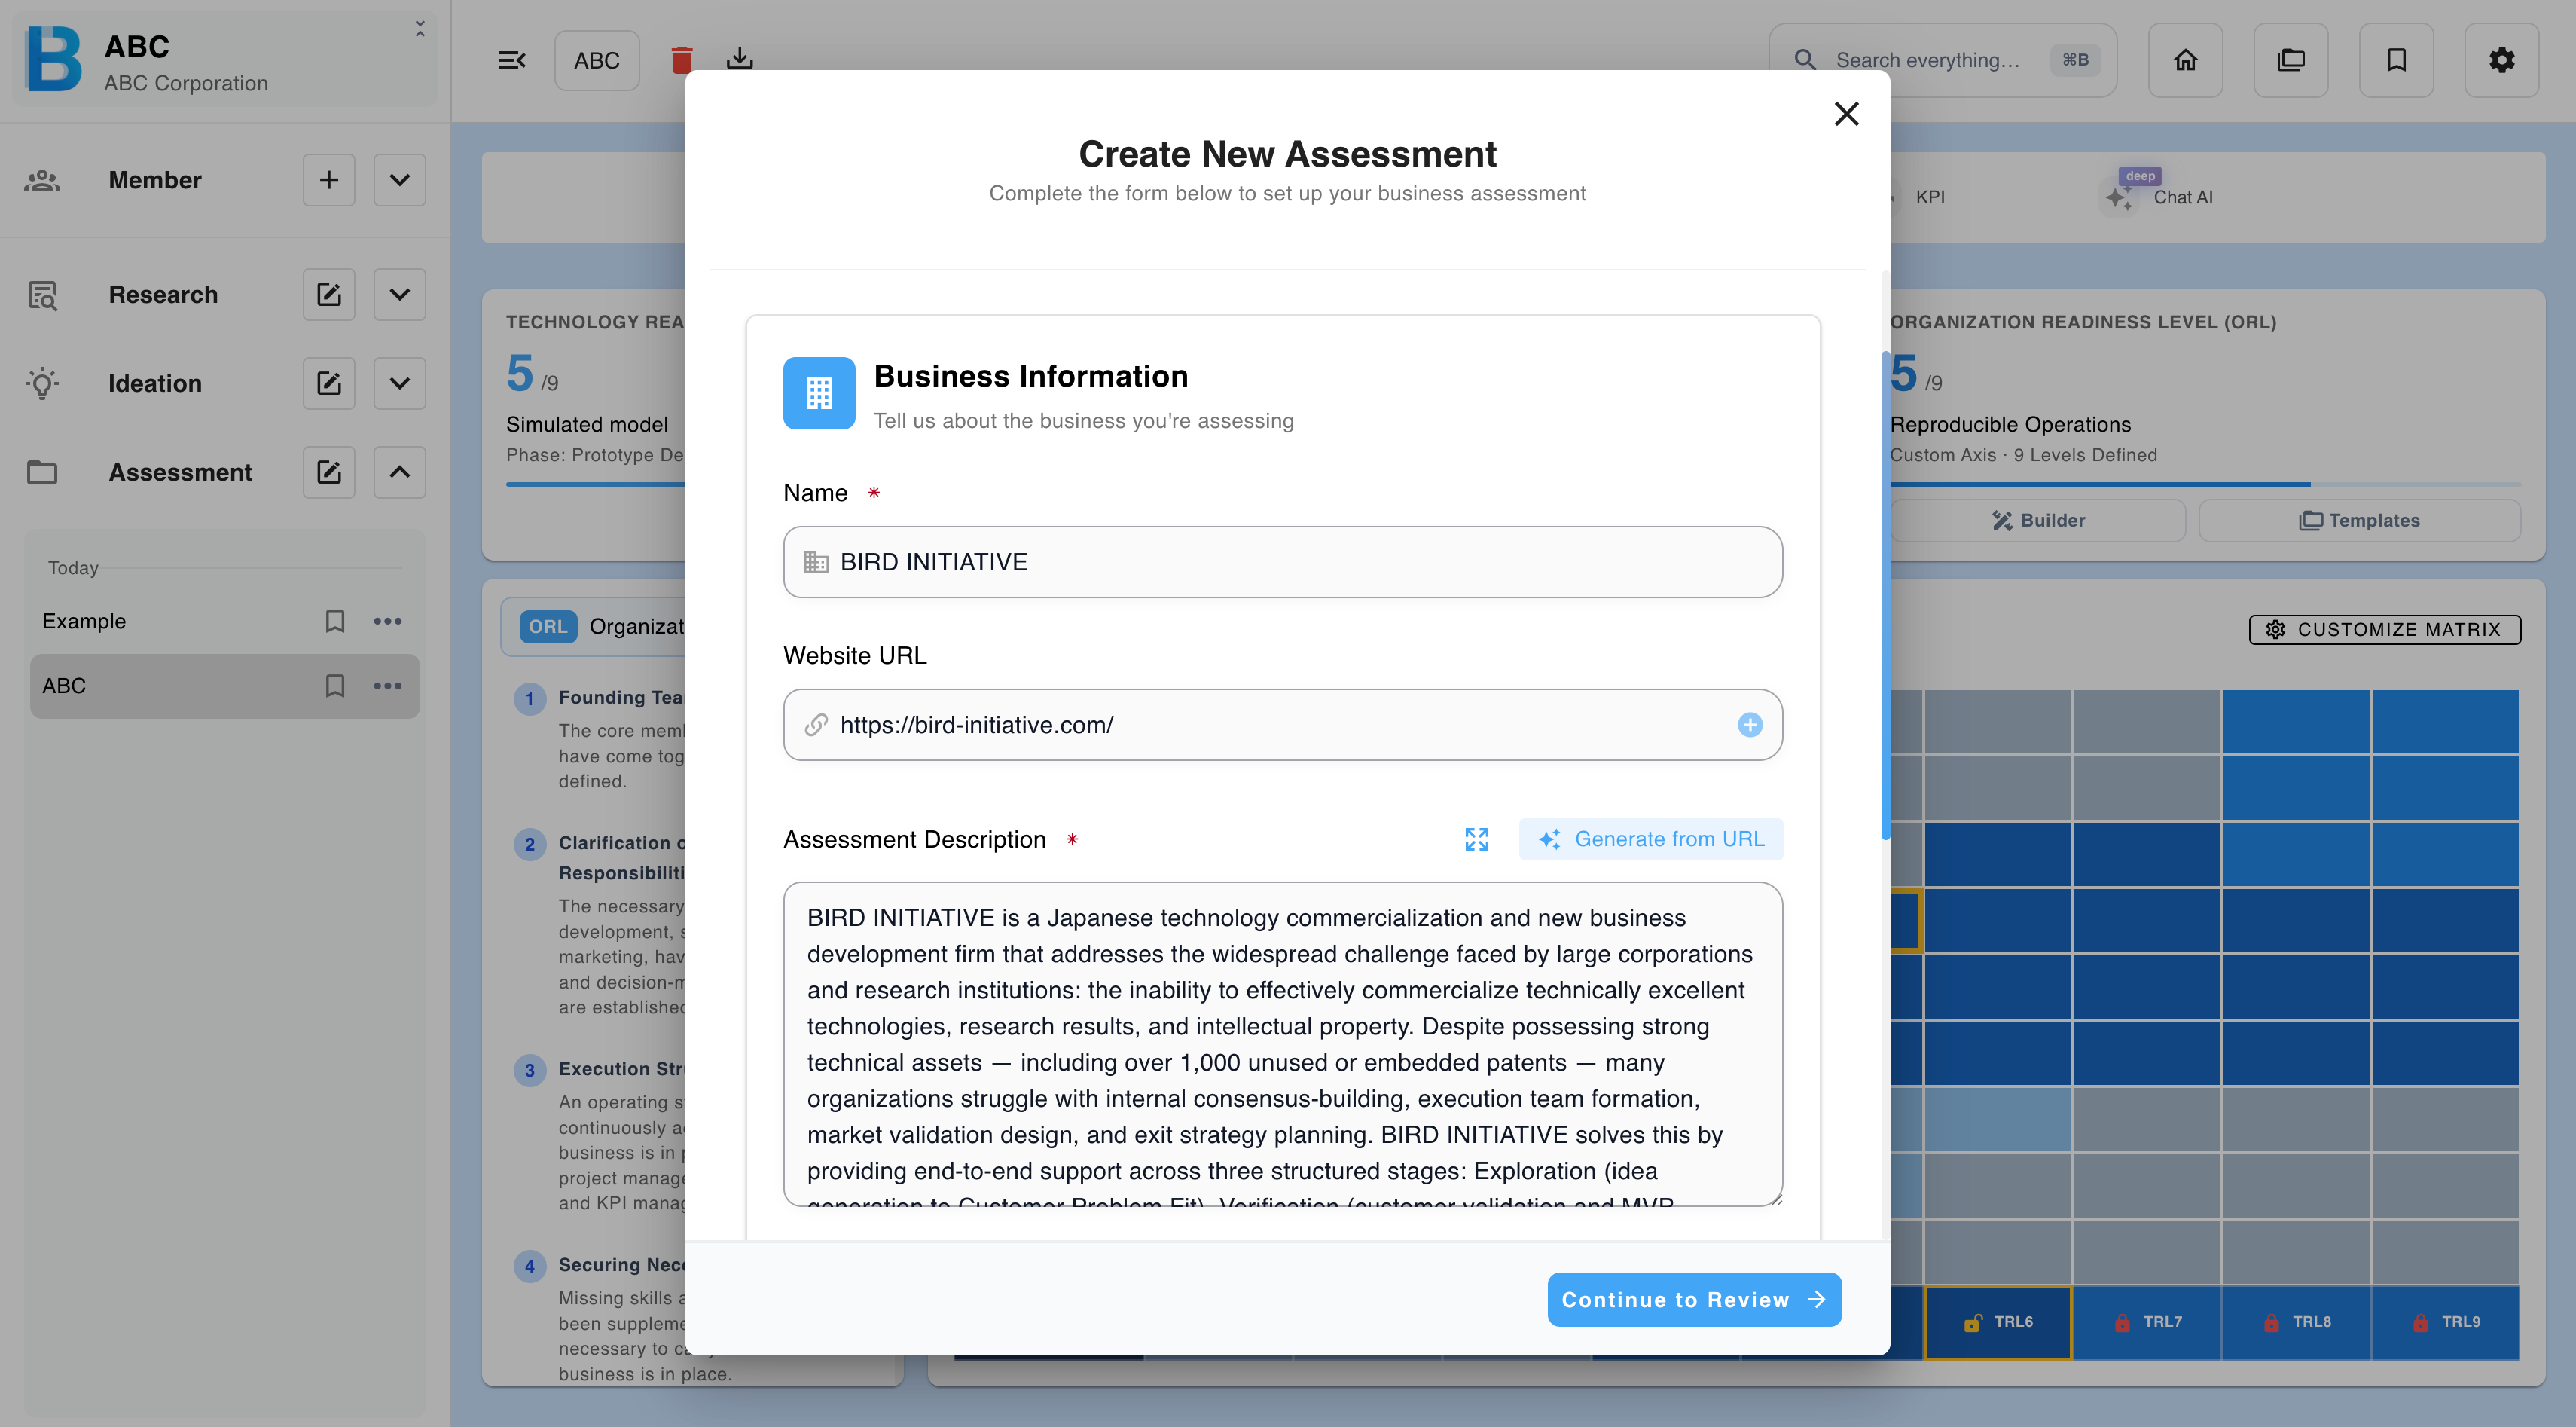
Only the name and description are required. Everything else is optional, but each addition materially improves the result.
What each addition buys you
| What you supply | What you get |
|---|---|
| Name and description | A readiness evaluation based on your own account of the project. |
| Plus a website URL | The URL can generate the description for you, and the site itself becomes evidence. |
| Plus files | An evidence-backed evaluation that cites specific documents. |
| Promoted from ideation | All of the above, plus the idea's full business model — see Managing Ideations. |
The jump from description-only to files-attached is by far the largest. Readiness levels are evidence-based: with no documents, the AI can only assess what you have asserted. Attach the pitch deck, the financial model, the test results — whatever shows the project's actual state rather than its intended one.
Creating the project
| Step | What to do |
|---|---|
| 1 | Select Assessment → Start a new project. |
| 2 | Enter the name — up to 70 characters — and a description. |
| 3 | Optionally add a website URL, and use it to generate the description. Check the address is correct; a malformed URL will not resolve. |
| 4 | Optionally upload files. |
| 5 | Review and send. |
| Limit | Value |
|---|---|
| Maximum per file | 50 MB |
| Images | .jpg .png |
| Documents | .doc .docx .pdf .ppt .pptx .xls .xlsx .txt .csv .md .html |
Promoting from ideation
Rather than re-entering everything, promote an existing ideation. The business model, the customer and the revenue structure all come across with it — see Managing Ideations.
The result screen
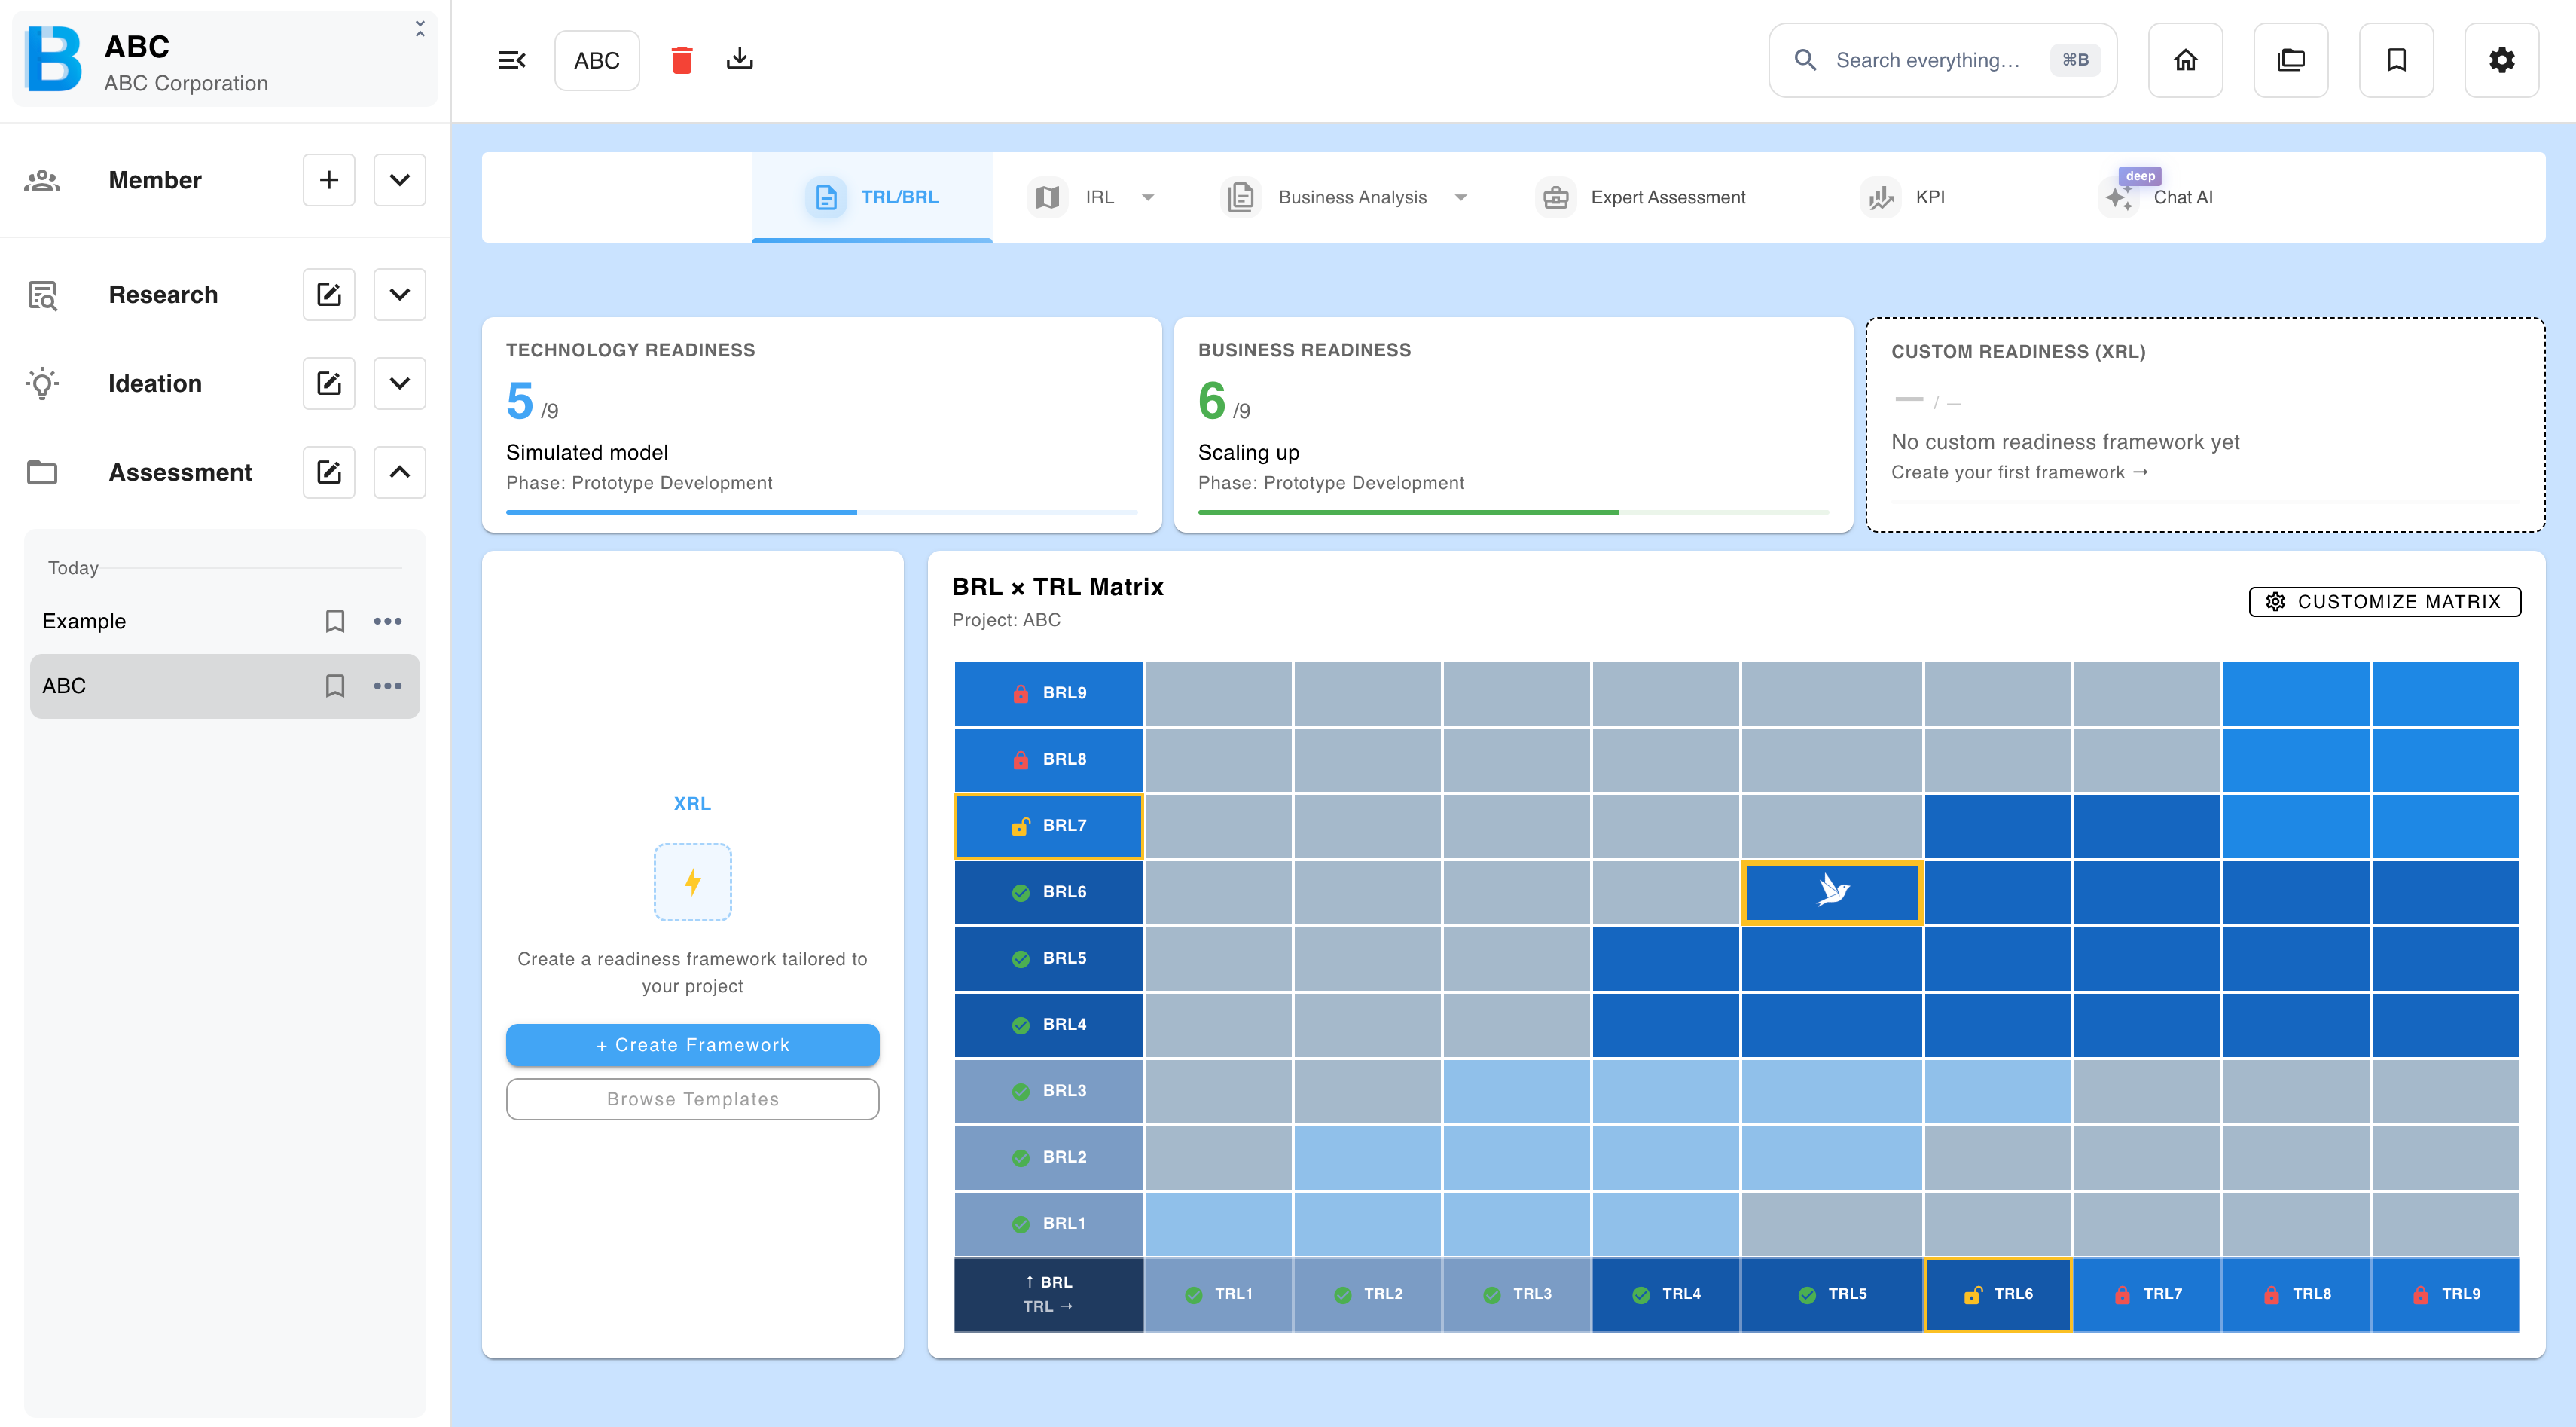
Readiness cards across the top show each axis's level and phase name. Below them is the matrix, with a marker at your current position.
| Element | What it does |
|---|---|
| Readiness card | Opens that axis's report. |
| Position marker | Opens the report for the matrix axes. |
| Cells above your level | Show the requirements for that level. |
| Customize matrix | Changes which axes the matrix displays. |
| Builder | Defines a custom readiness level — see Readiness Levels and Matrix. |
Once the project has been created, select the BIRD icon to open the Readiness overview. It can be downloaded as Word or PDF.