Group administration
The file management screen also holds the group's administrative tabs. Which tabs you see depends on your role.
| Tab | Owner | Member | Guest |
|---|---|---|---|
| Profile | Edit | View | — |
| Members | Manage | View | — |
| Activity | Yes | — | — |
| Public sharing | Yes | — | — |
| File management | Yes | Yes | — |
Members see three tabs — profile, members and file management — and cannot edit or delete the group profile.
Profile
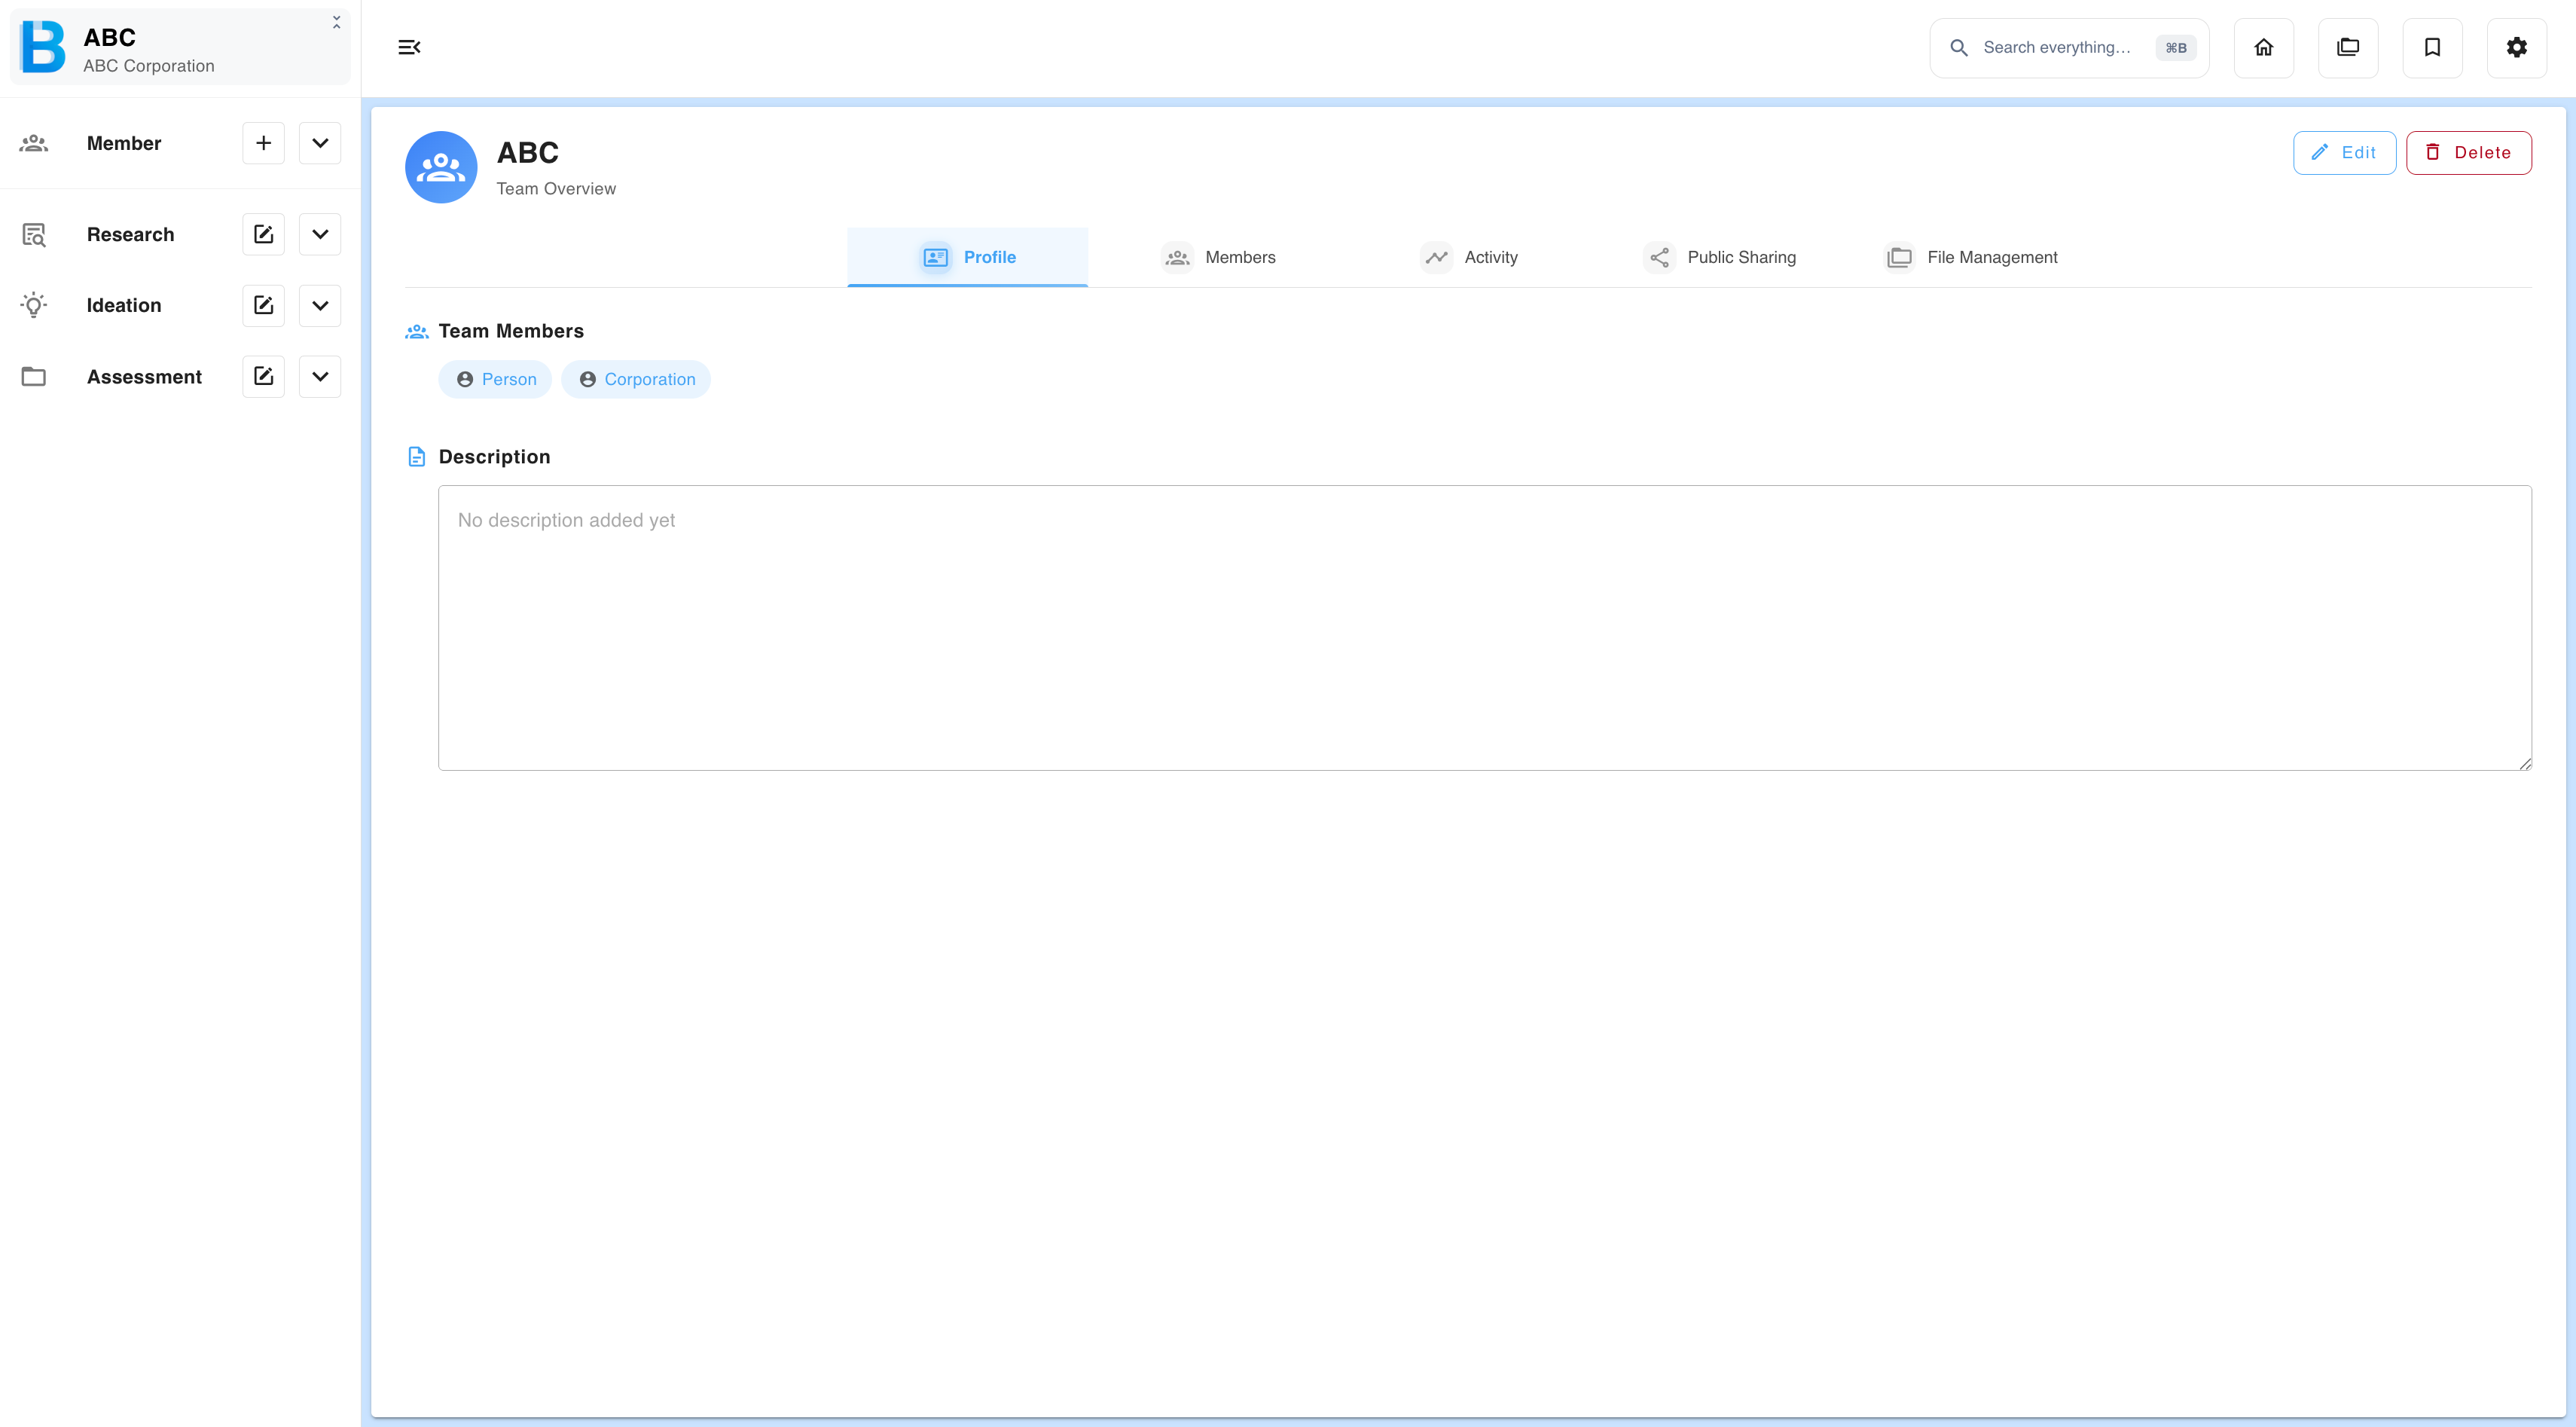
The group name, description and, for companies, the website URL, together with the member list. Only the owner can edit or delete.
Members
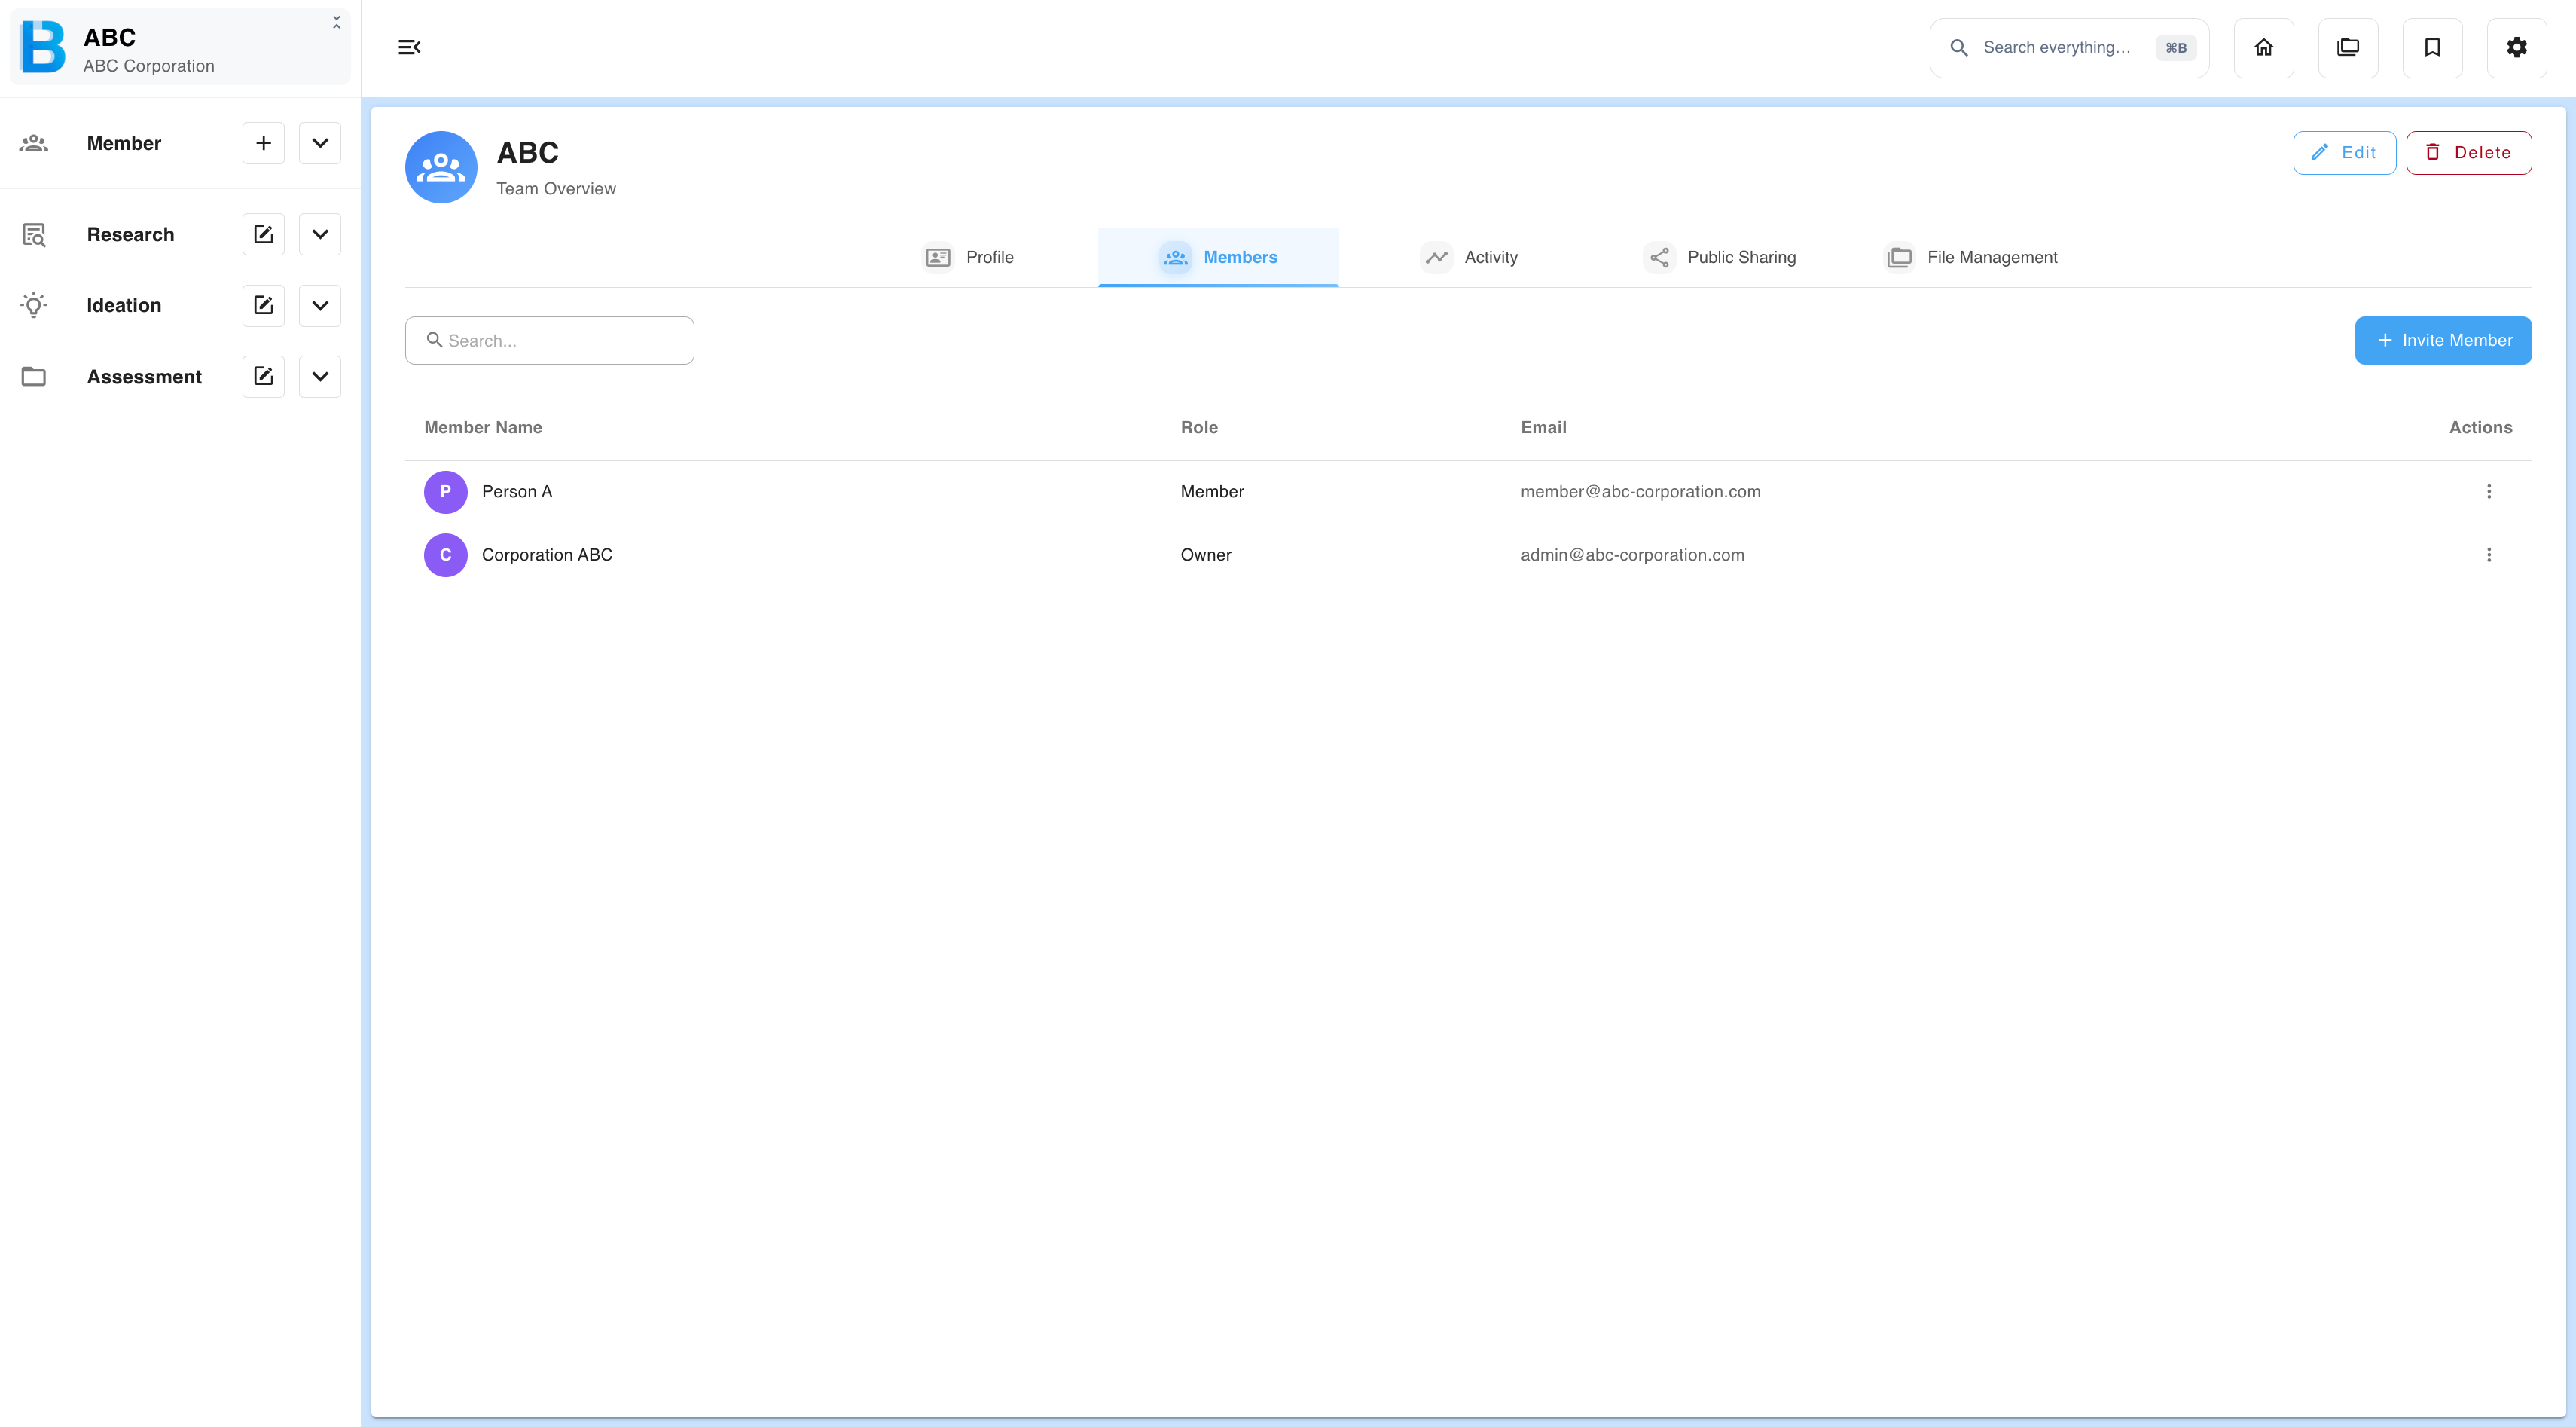
The full member list. Owners can invite people, remove them and change roles from here — see Invite Members.
Activity
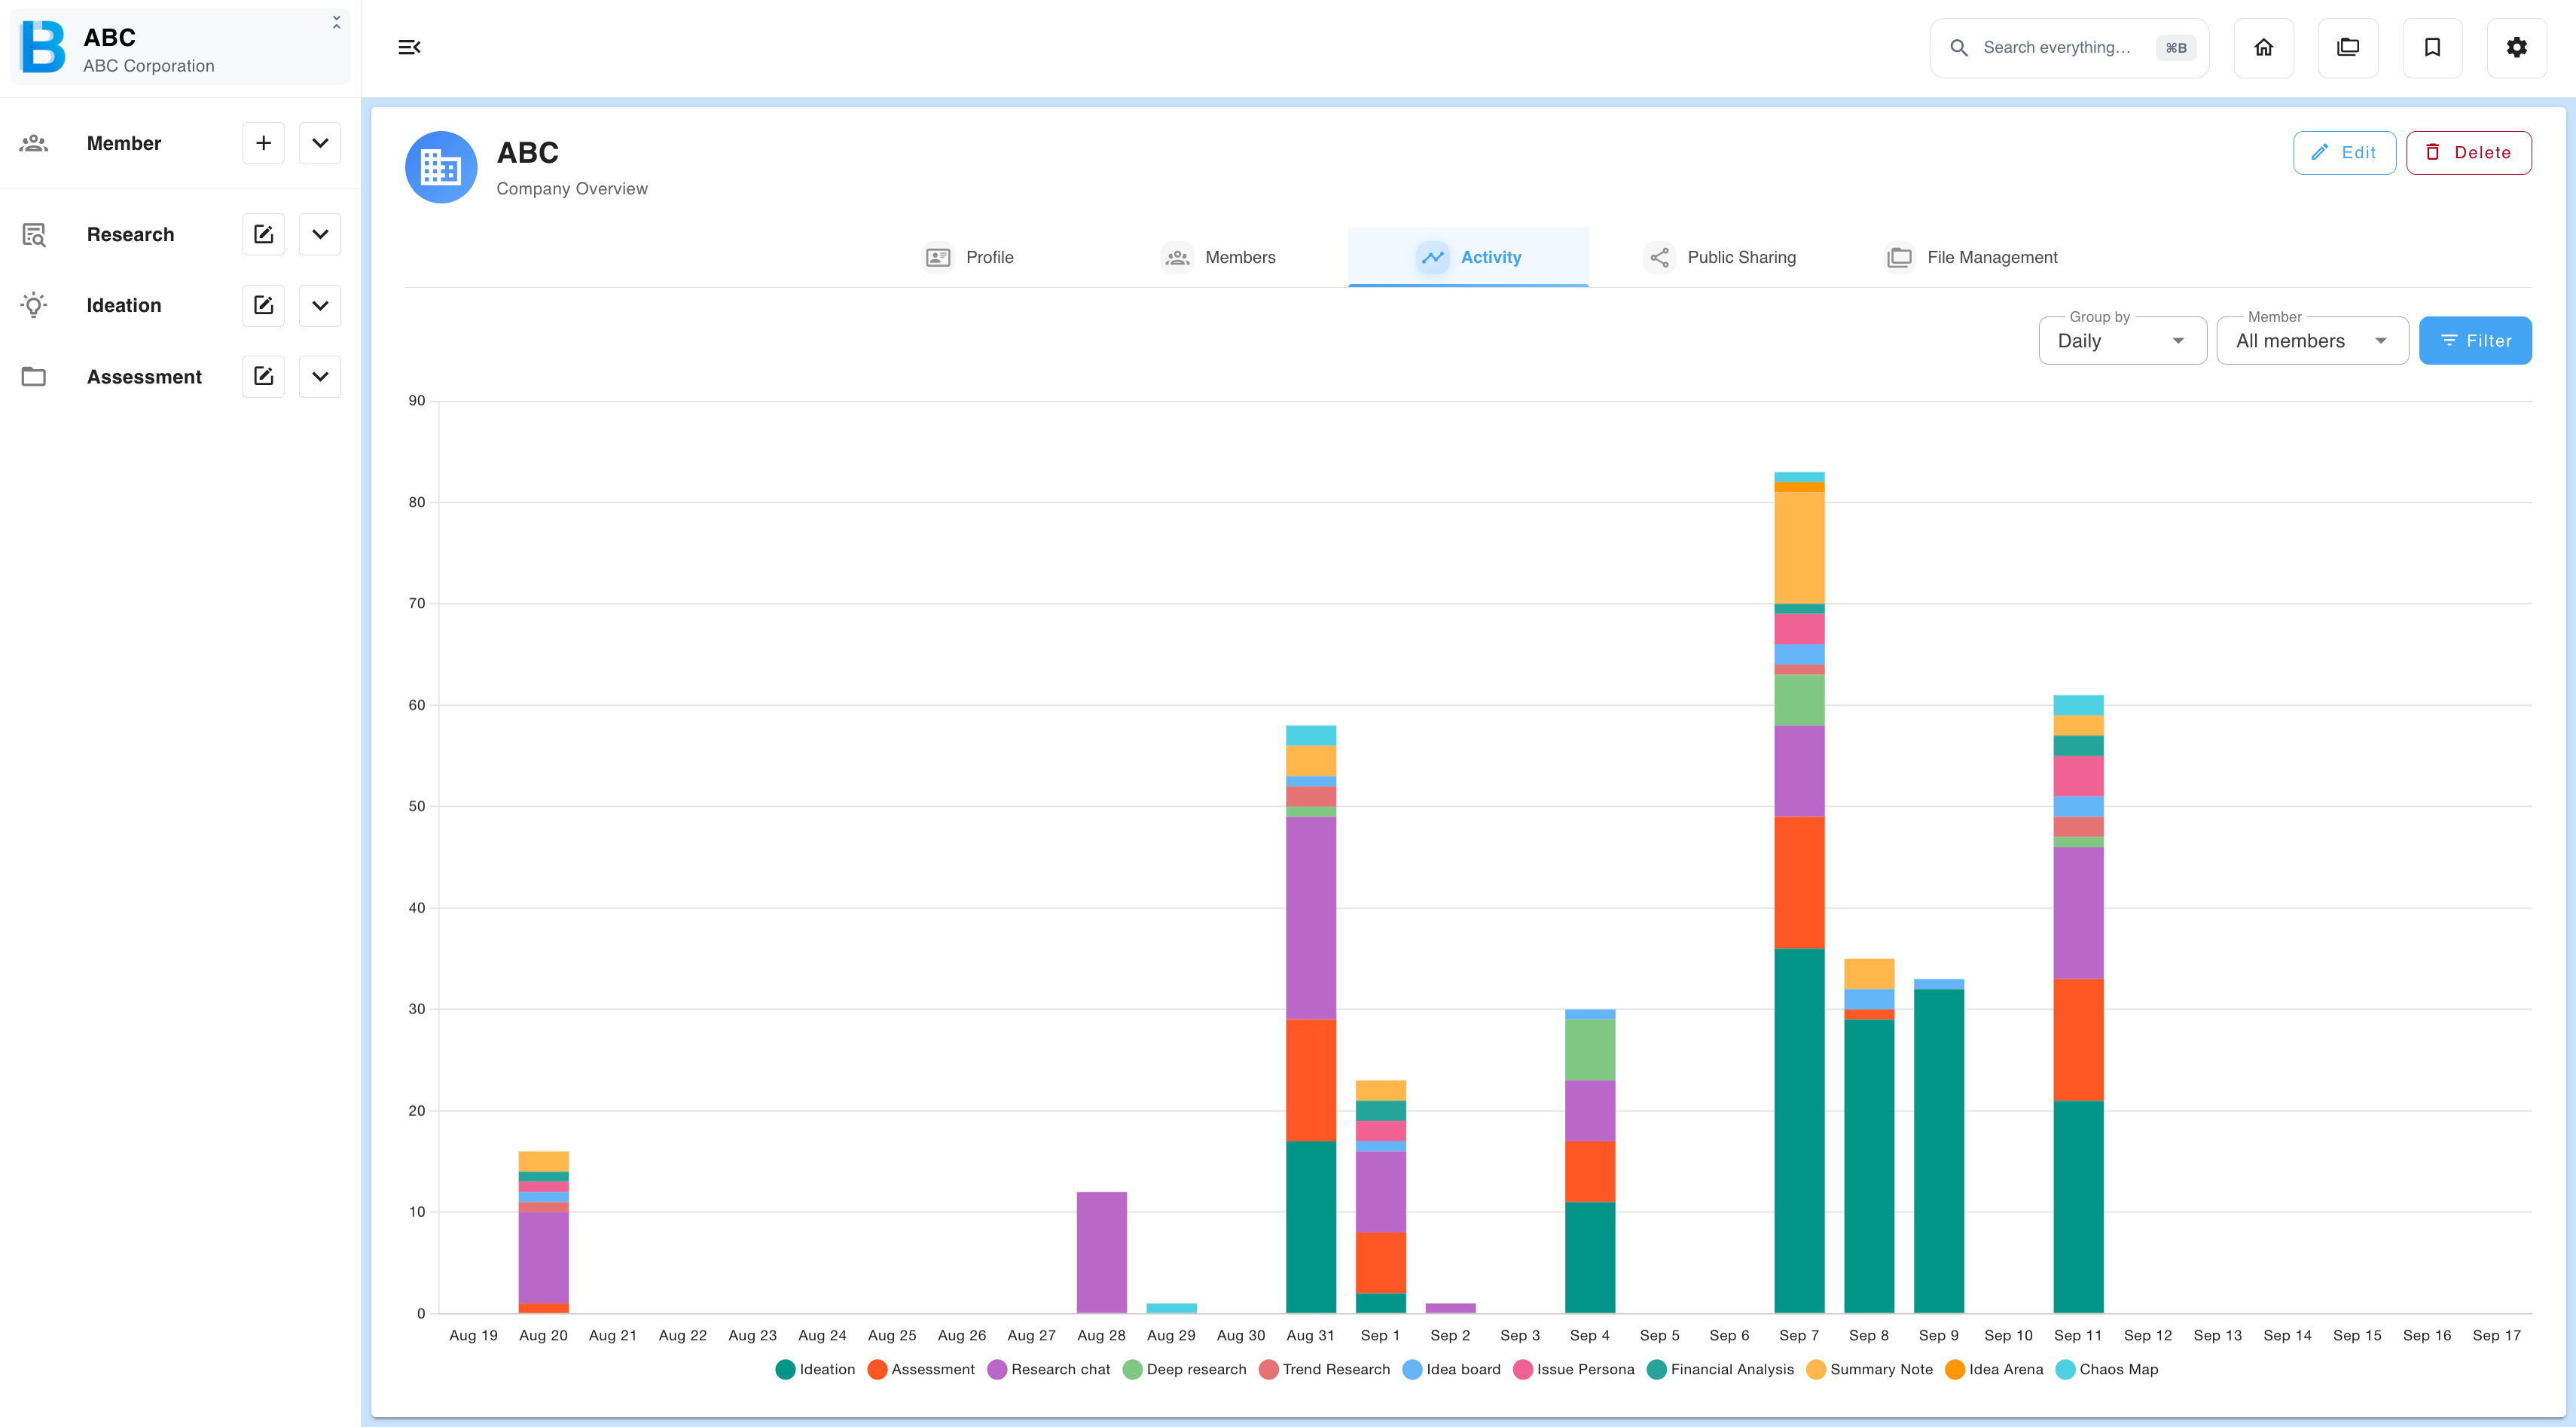
A graph of generation activity across the group. Filter by date range, and by individual member or all members. This is the quickest way to see who is actually using the platform and on what, which matters most during a trial or a rollout.
Public sharing
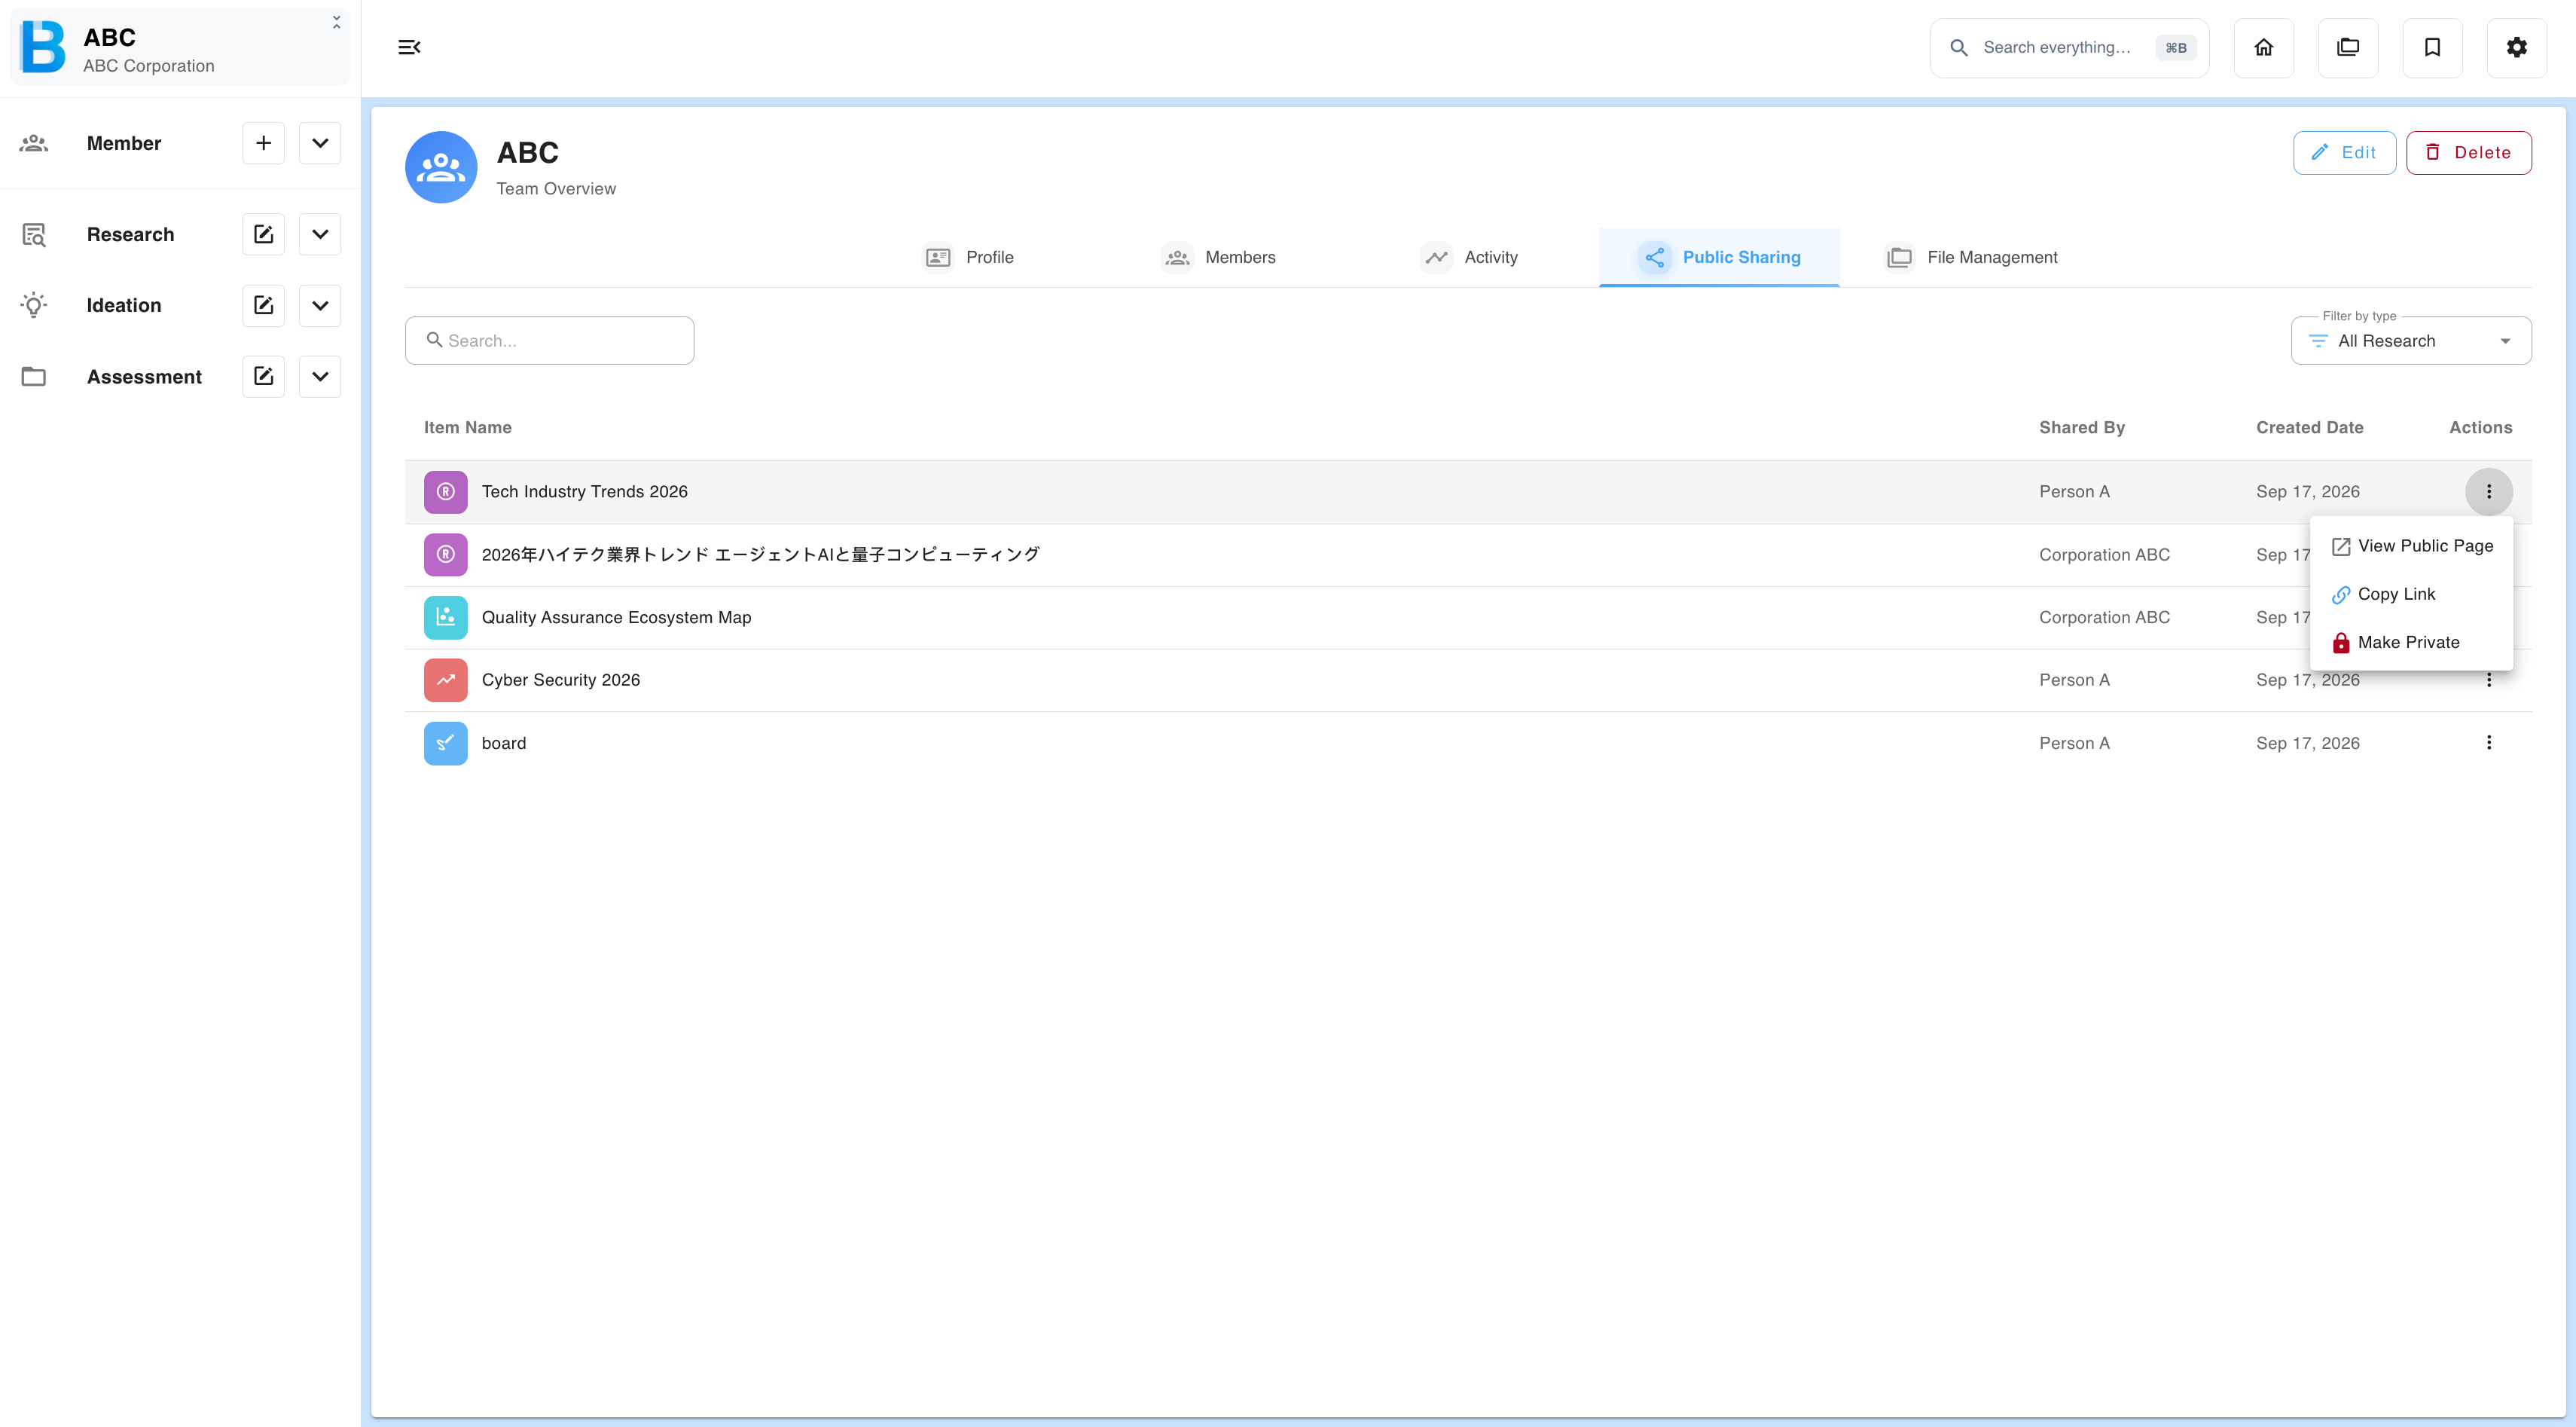
An audit list of every AI-generated item that has been shared outside the group, and who shared it. Since the owner grants sharing to individual members, this tab is how they keep track of what has left the group afterwards — see Public Sharing.
File management
File management is the group's shared storage. Everything in it belongs to the group, so every member sees the same files. Open it with the folder icon in the top right, or from the File management widget on the dashboard.
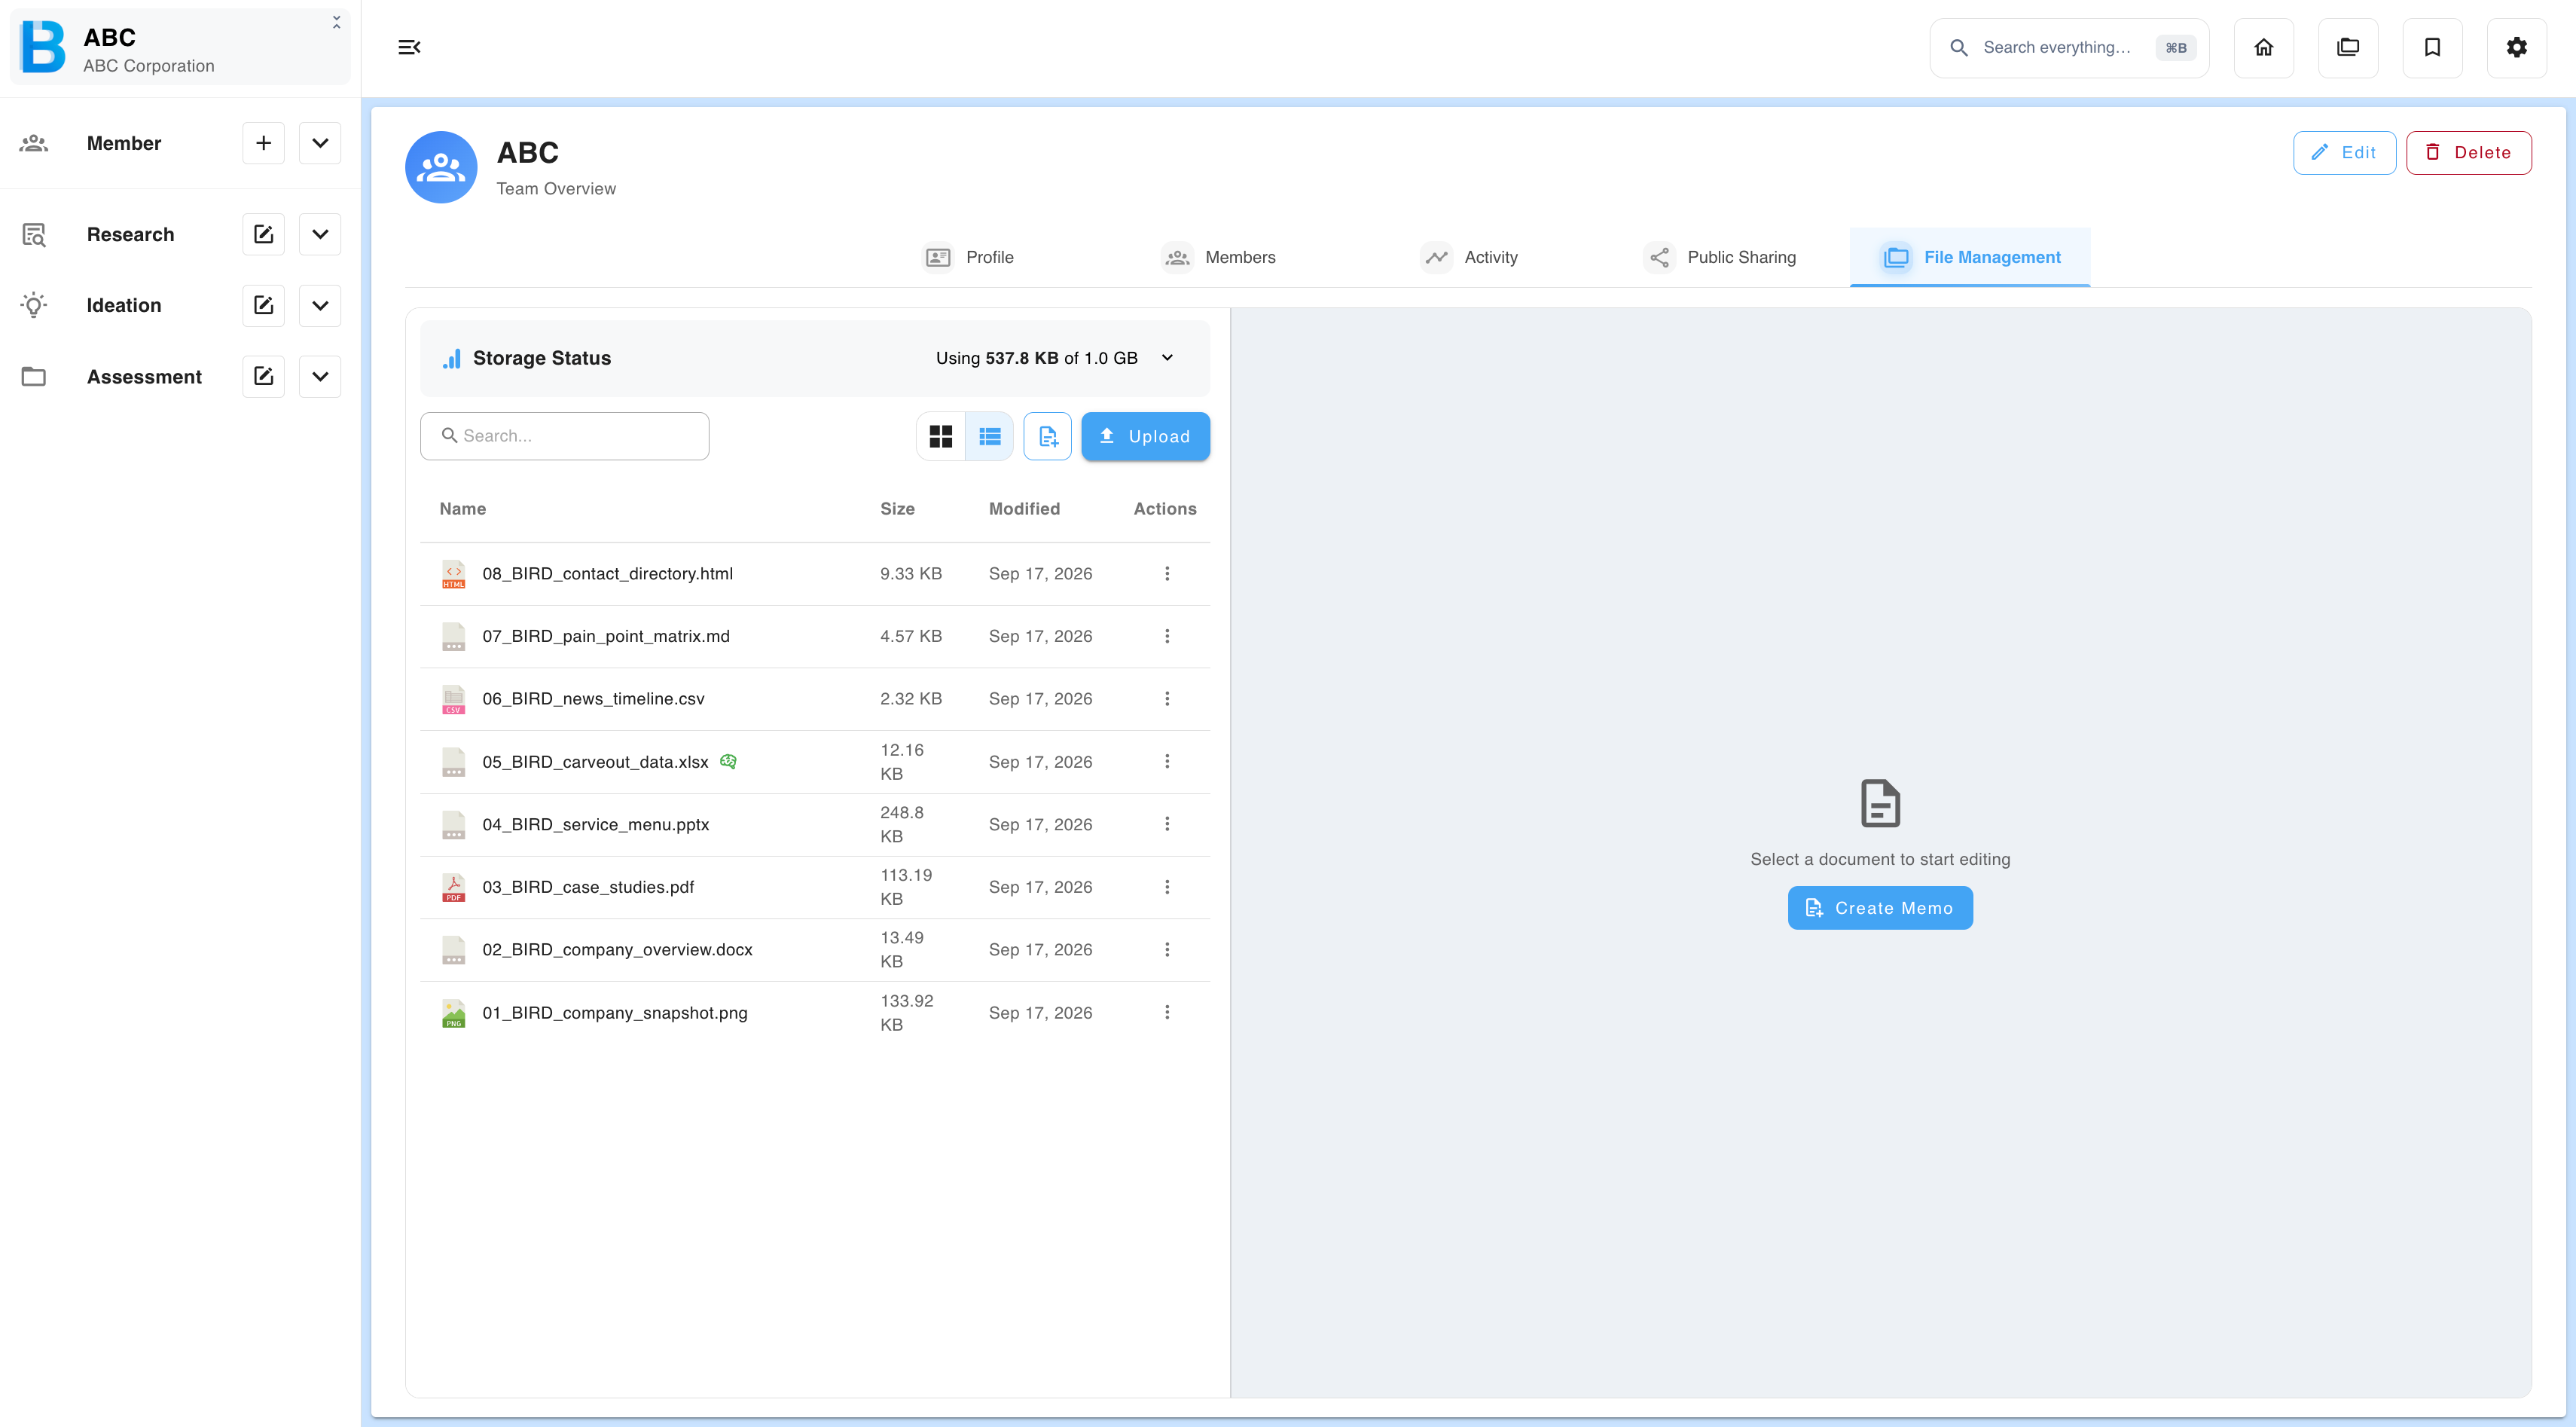
What the controls do
| Control | What it does |
|---|---|
| Search | Filters the file list by name. |
| Grid / list toggle | Switches between the two views of the same files. |
| New document | Creates a memo — a Markdown file you write inside BIIM. |
| Upload | Adds files from your computer. |
| ··· on a file | Per-file actions, including download and delete. |
For file size and storage limits, see Limits.
Creating a memo
A memo is a note you write inside BIIM rather than upload. It is stored as a Markdown file — the extension is .md — which means it sits in file management alongside your uploads and can be used in exactly the same ways, including as AI context.
Use a memo when the thing you want the AI to know does not exist as a document yet: meeting notes, a product brief, internal constraints, or a summary you have written by hand.
Step 1 — Create the file
In file management, select the new document icon beside Upload. A new file appears in the list called Untitled document.md.
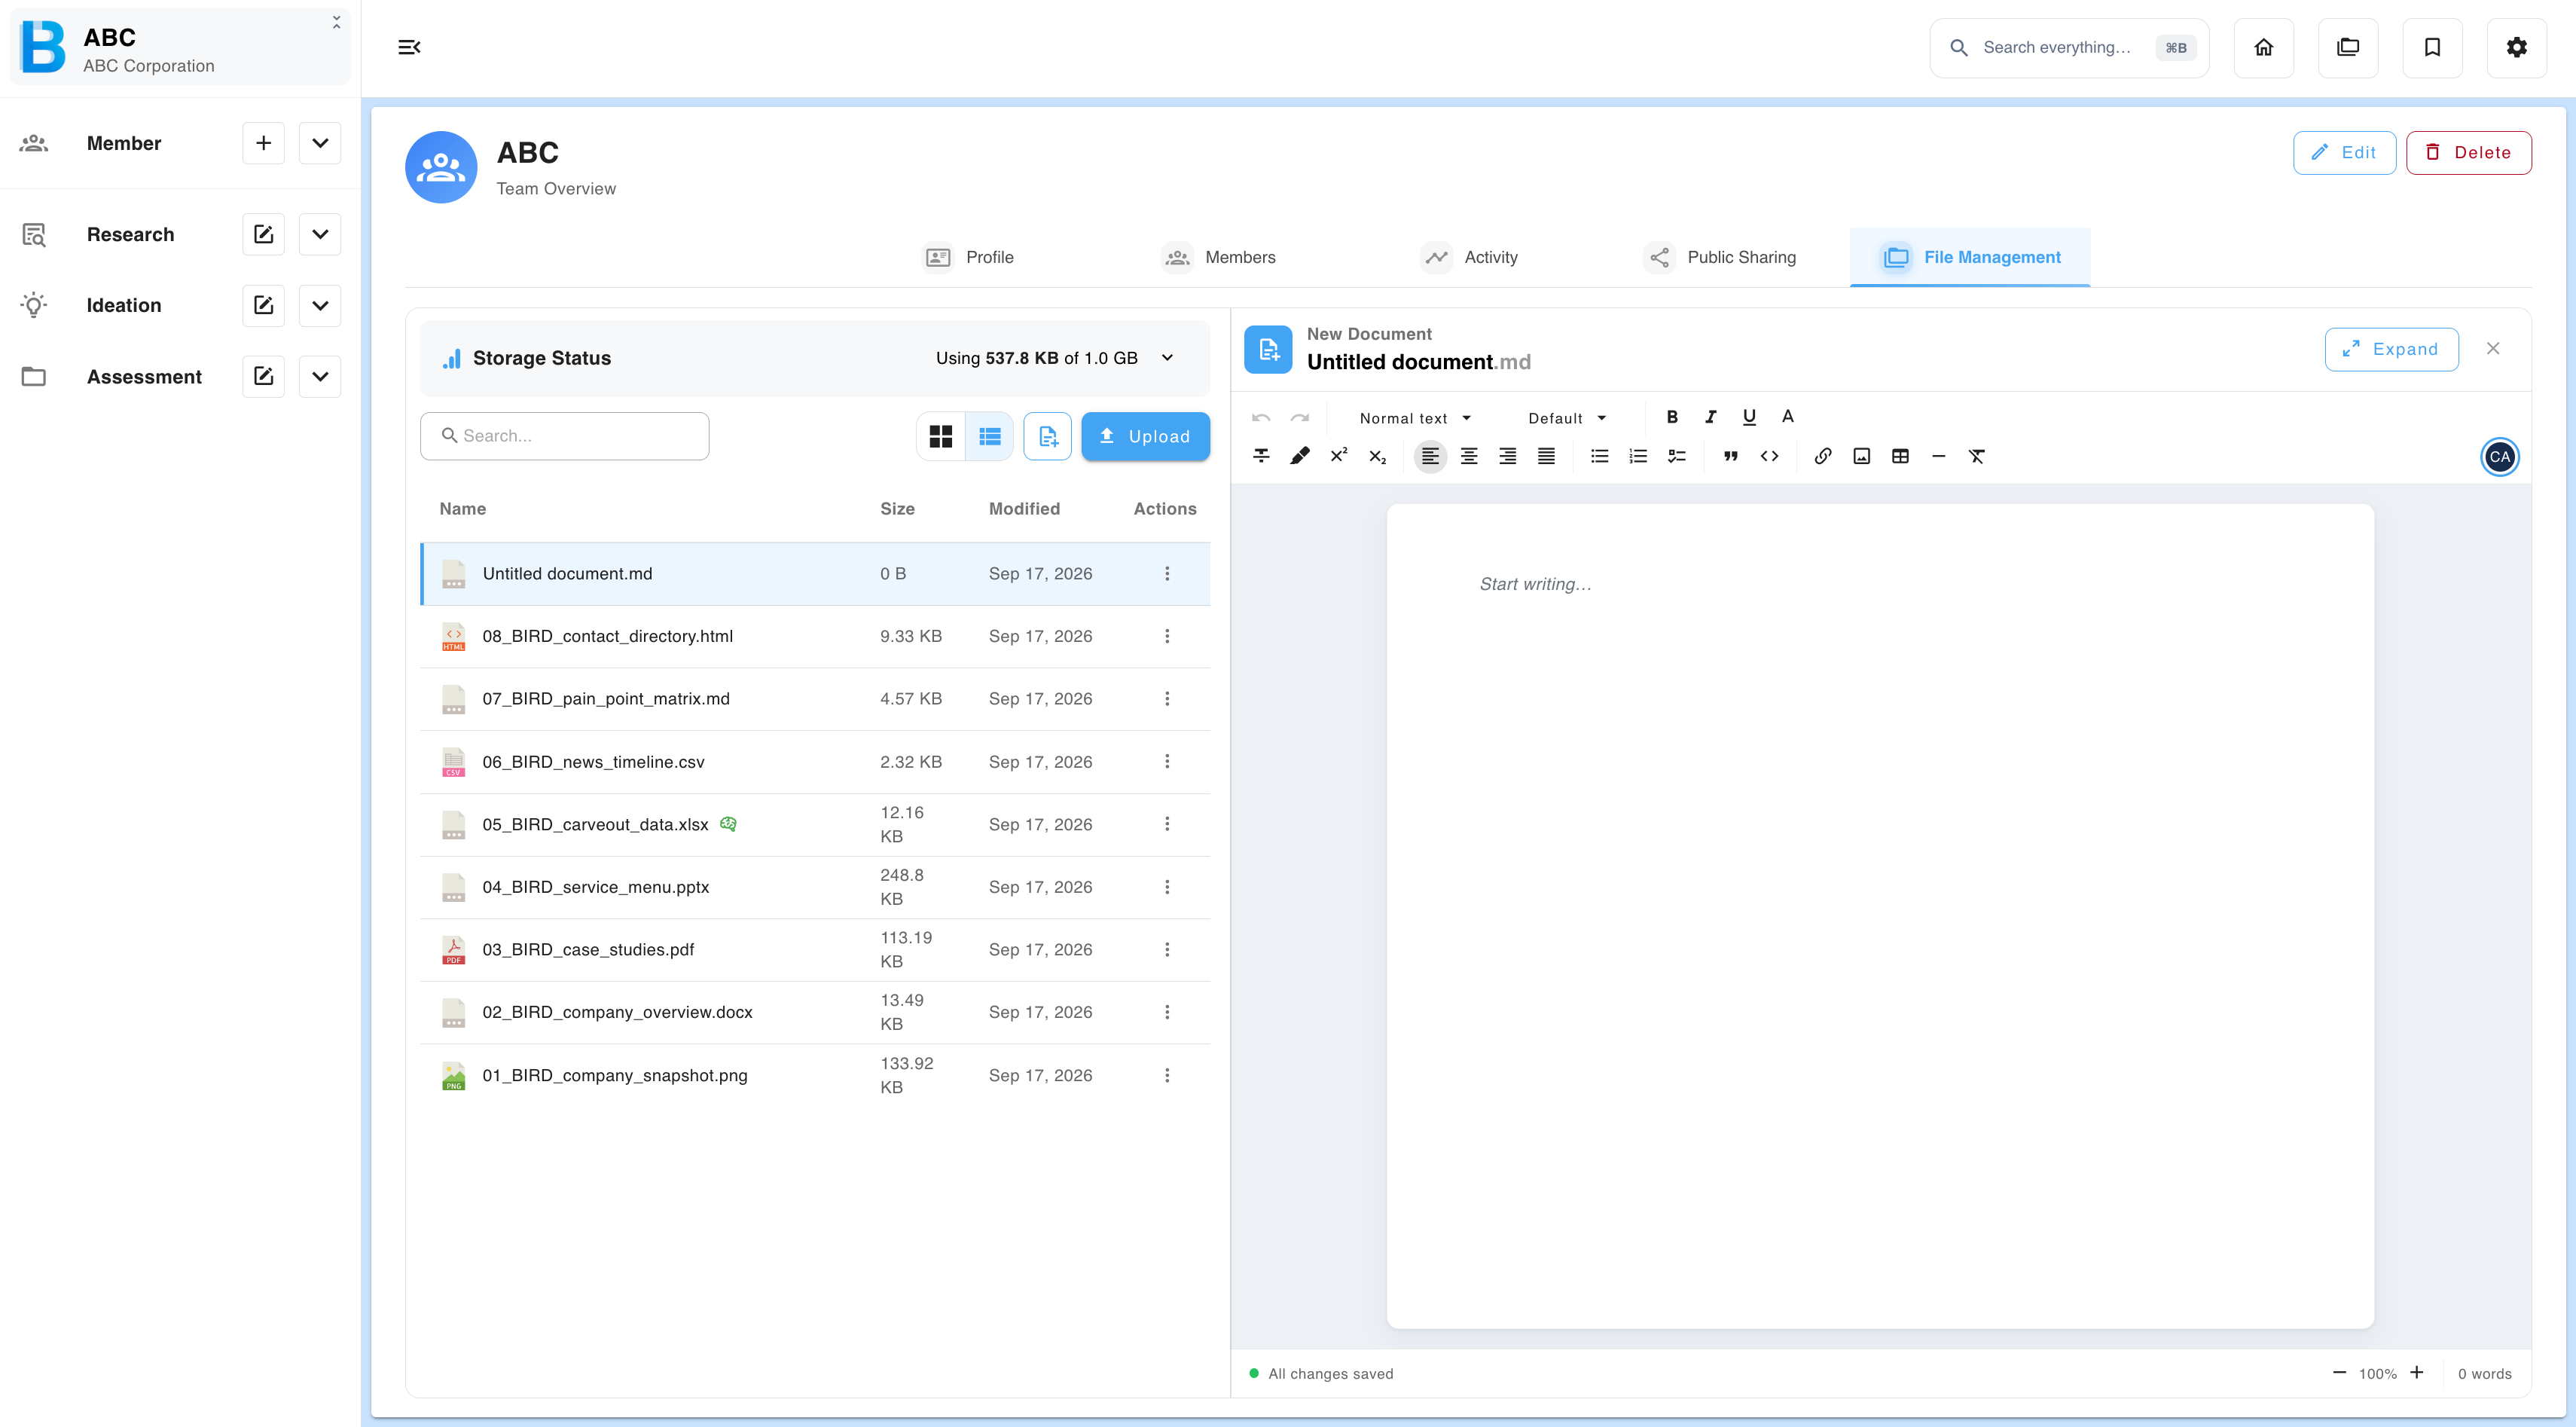
Step 2 — Name it
Give the memo a name that will still make sense to a colleague in six months. The .md extension is added for you — you do not need to type it.
Step 3 — Write it
The editor has a formatting toolbar for headings, bold, italic, lists, links and tables. Because the underlying format is Markdown, you can also type Markdown directly if you already know it.
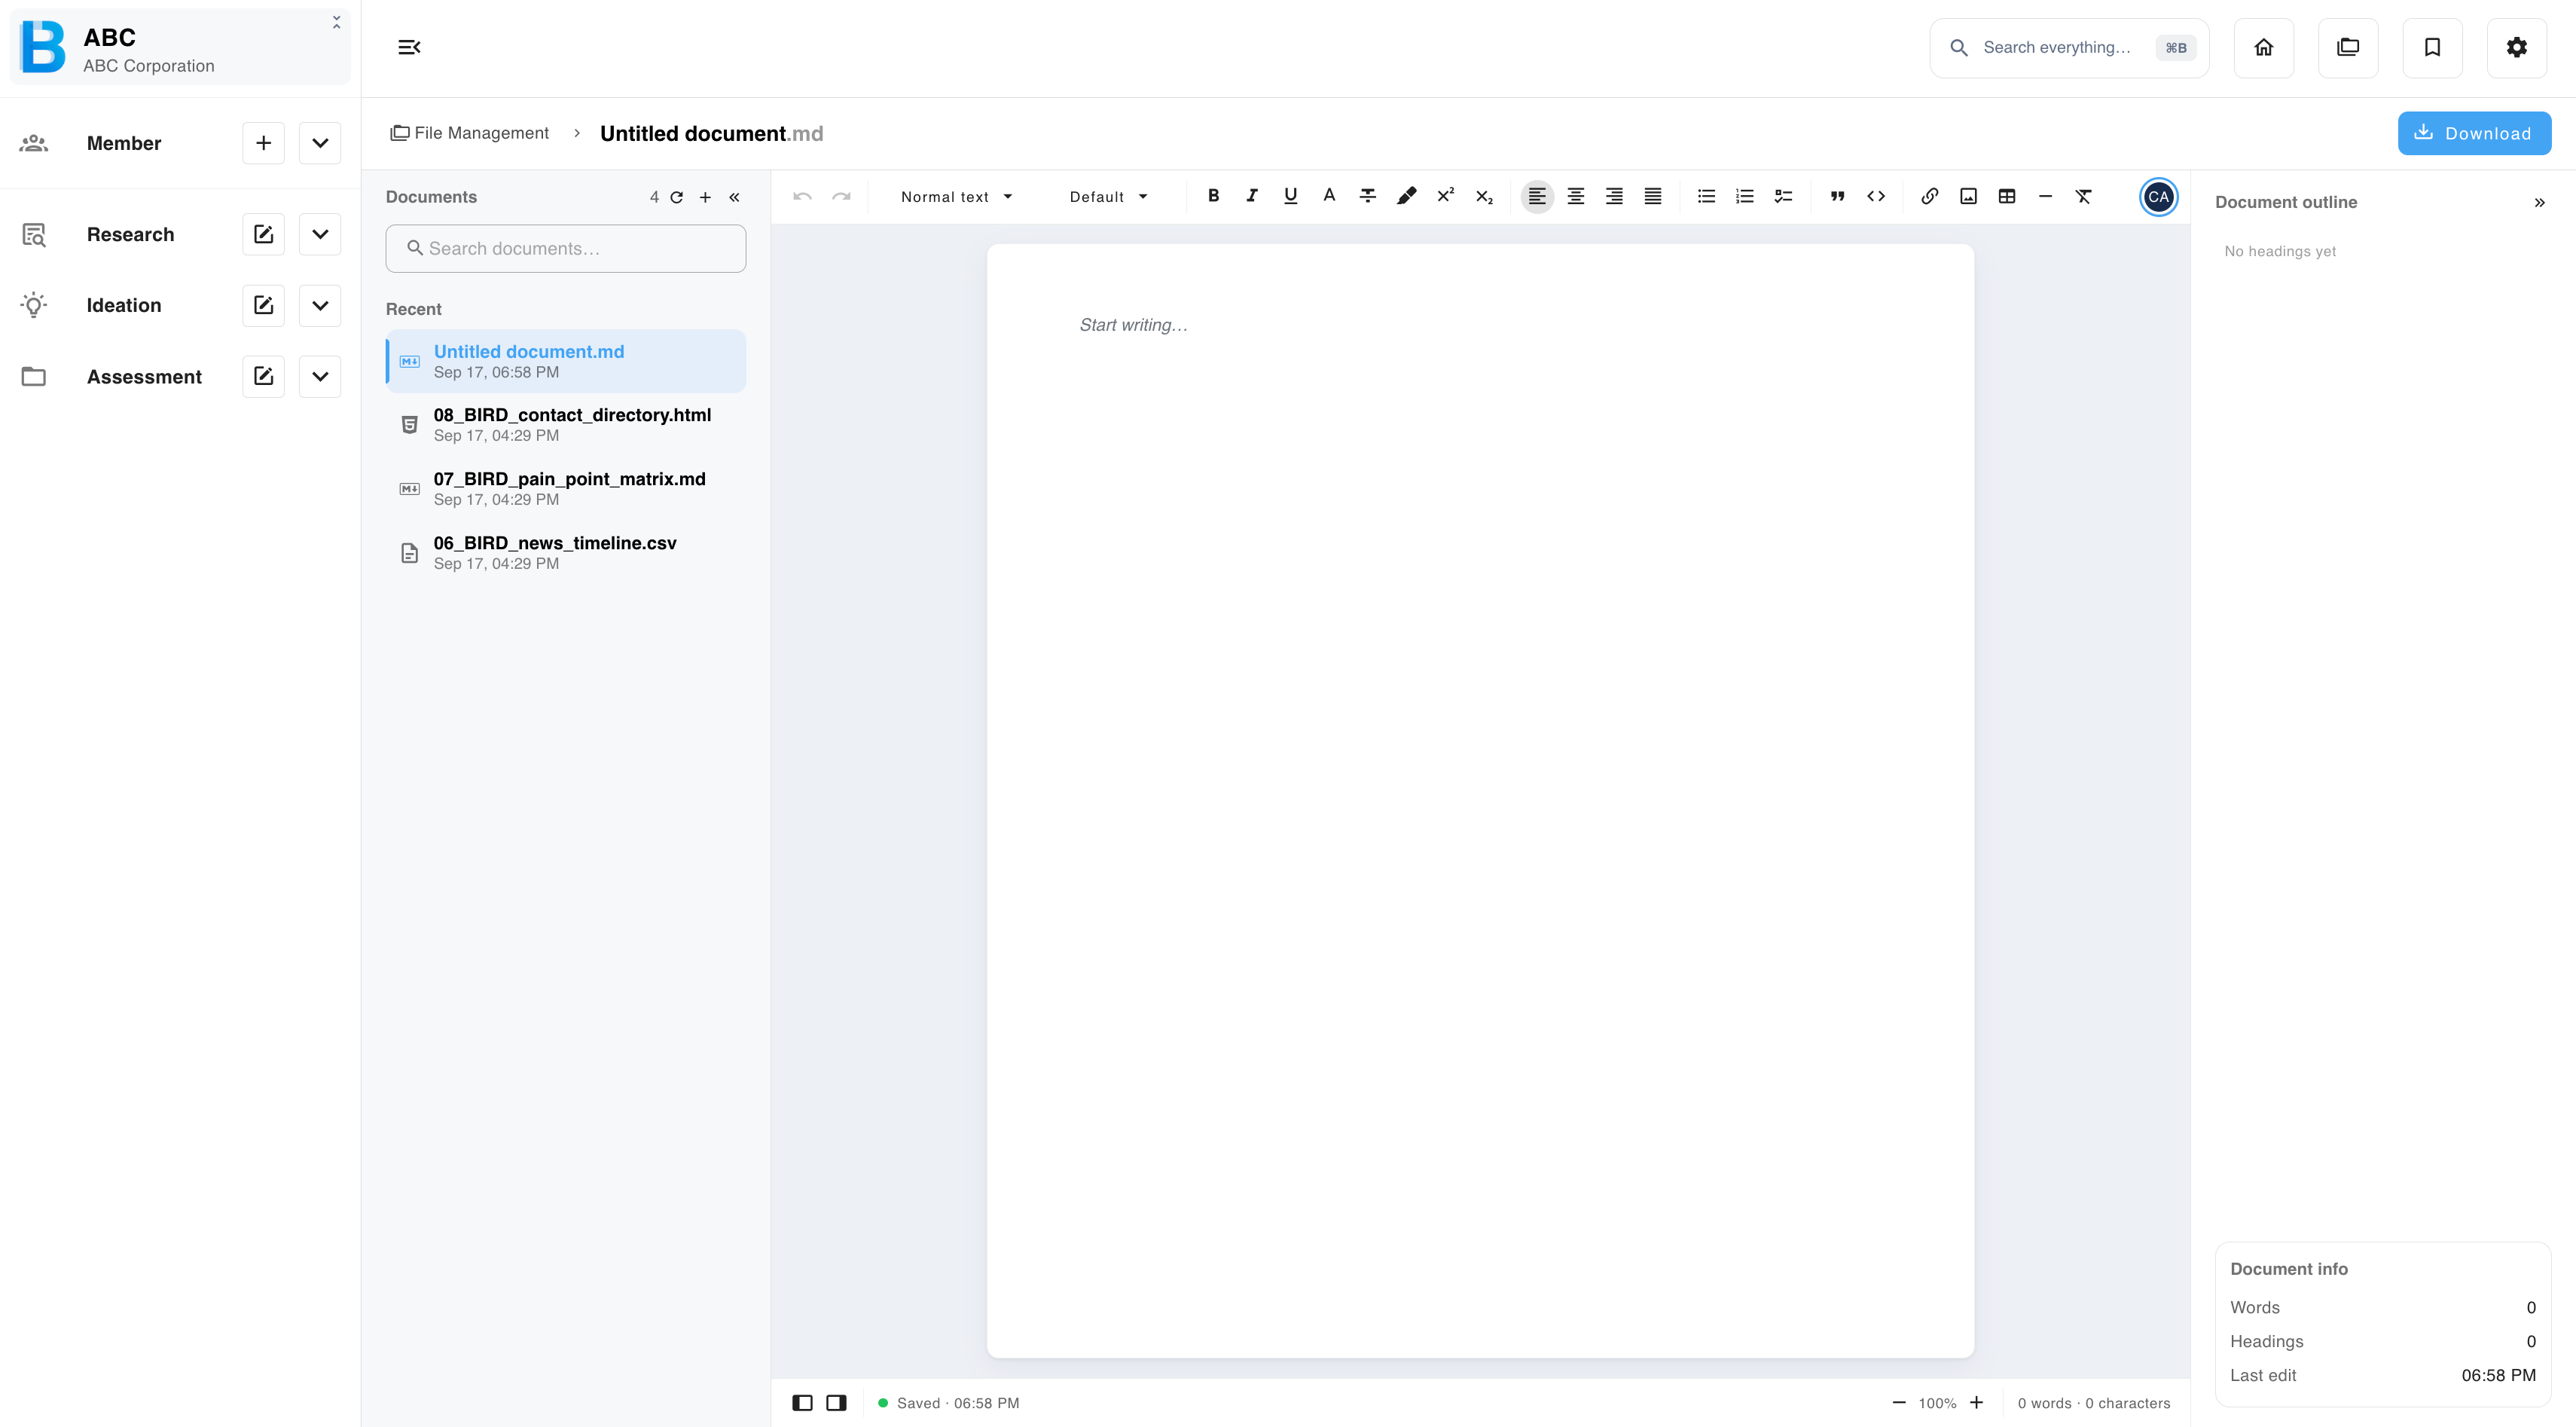
Step 4 — Expand for a larger view
Select the expand control to open the editor at full size. This is worth doing for anything longer than a few paragraphs, and for memos containing tables.
Step 5 — Save and close
Save the memo. It now appears in the file list like any uploaded file, and every member of the group can open it.