Inviting members
Members of a group share its data and can generate information together. Invitations always apply to the group you are currently viewing, so check you are in the right group before inviting anyone.
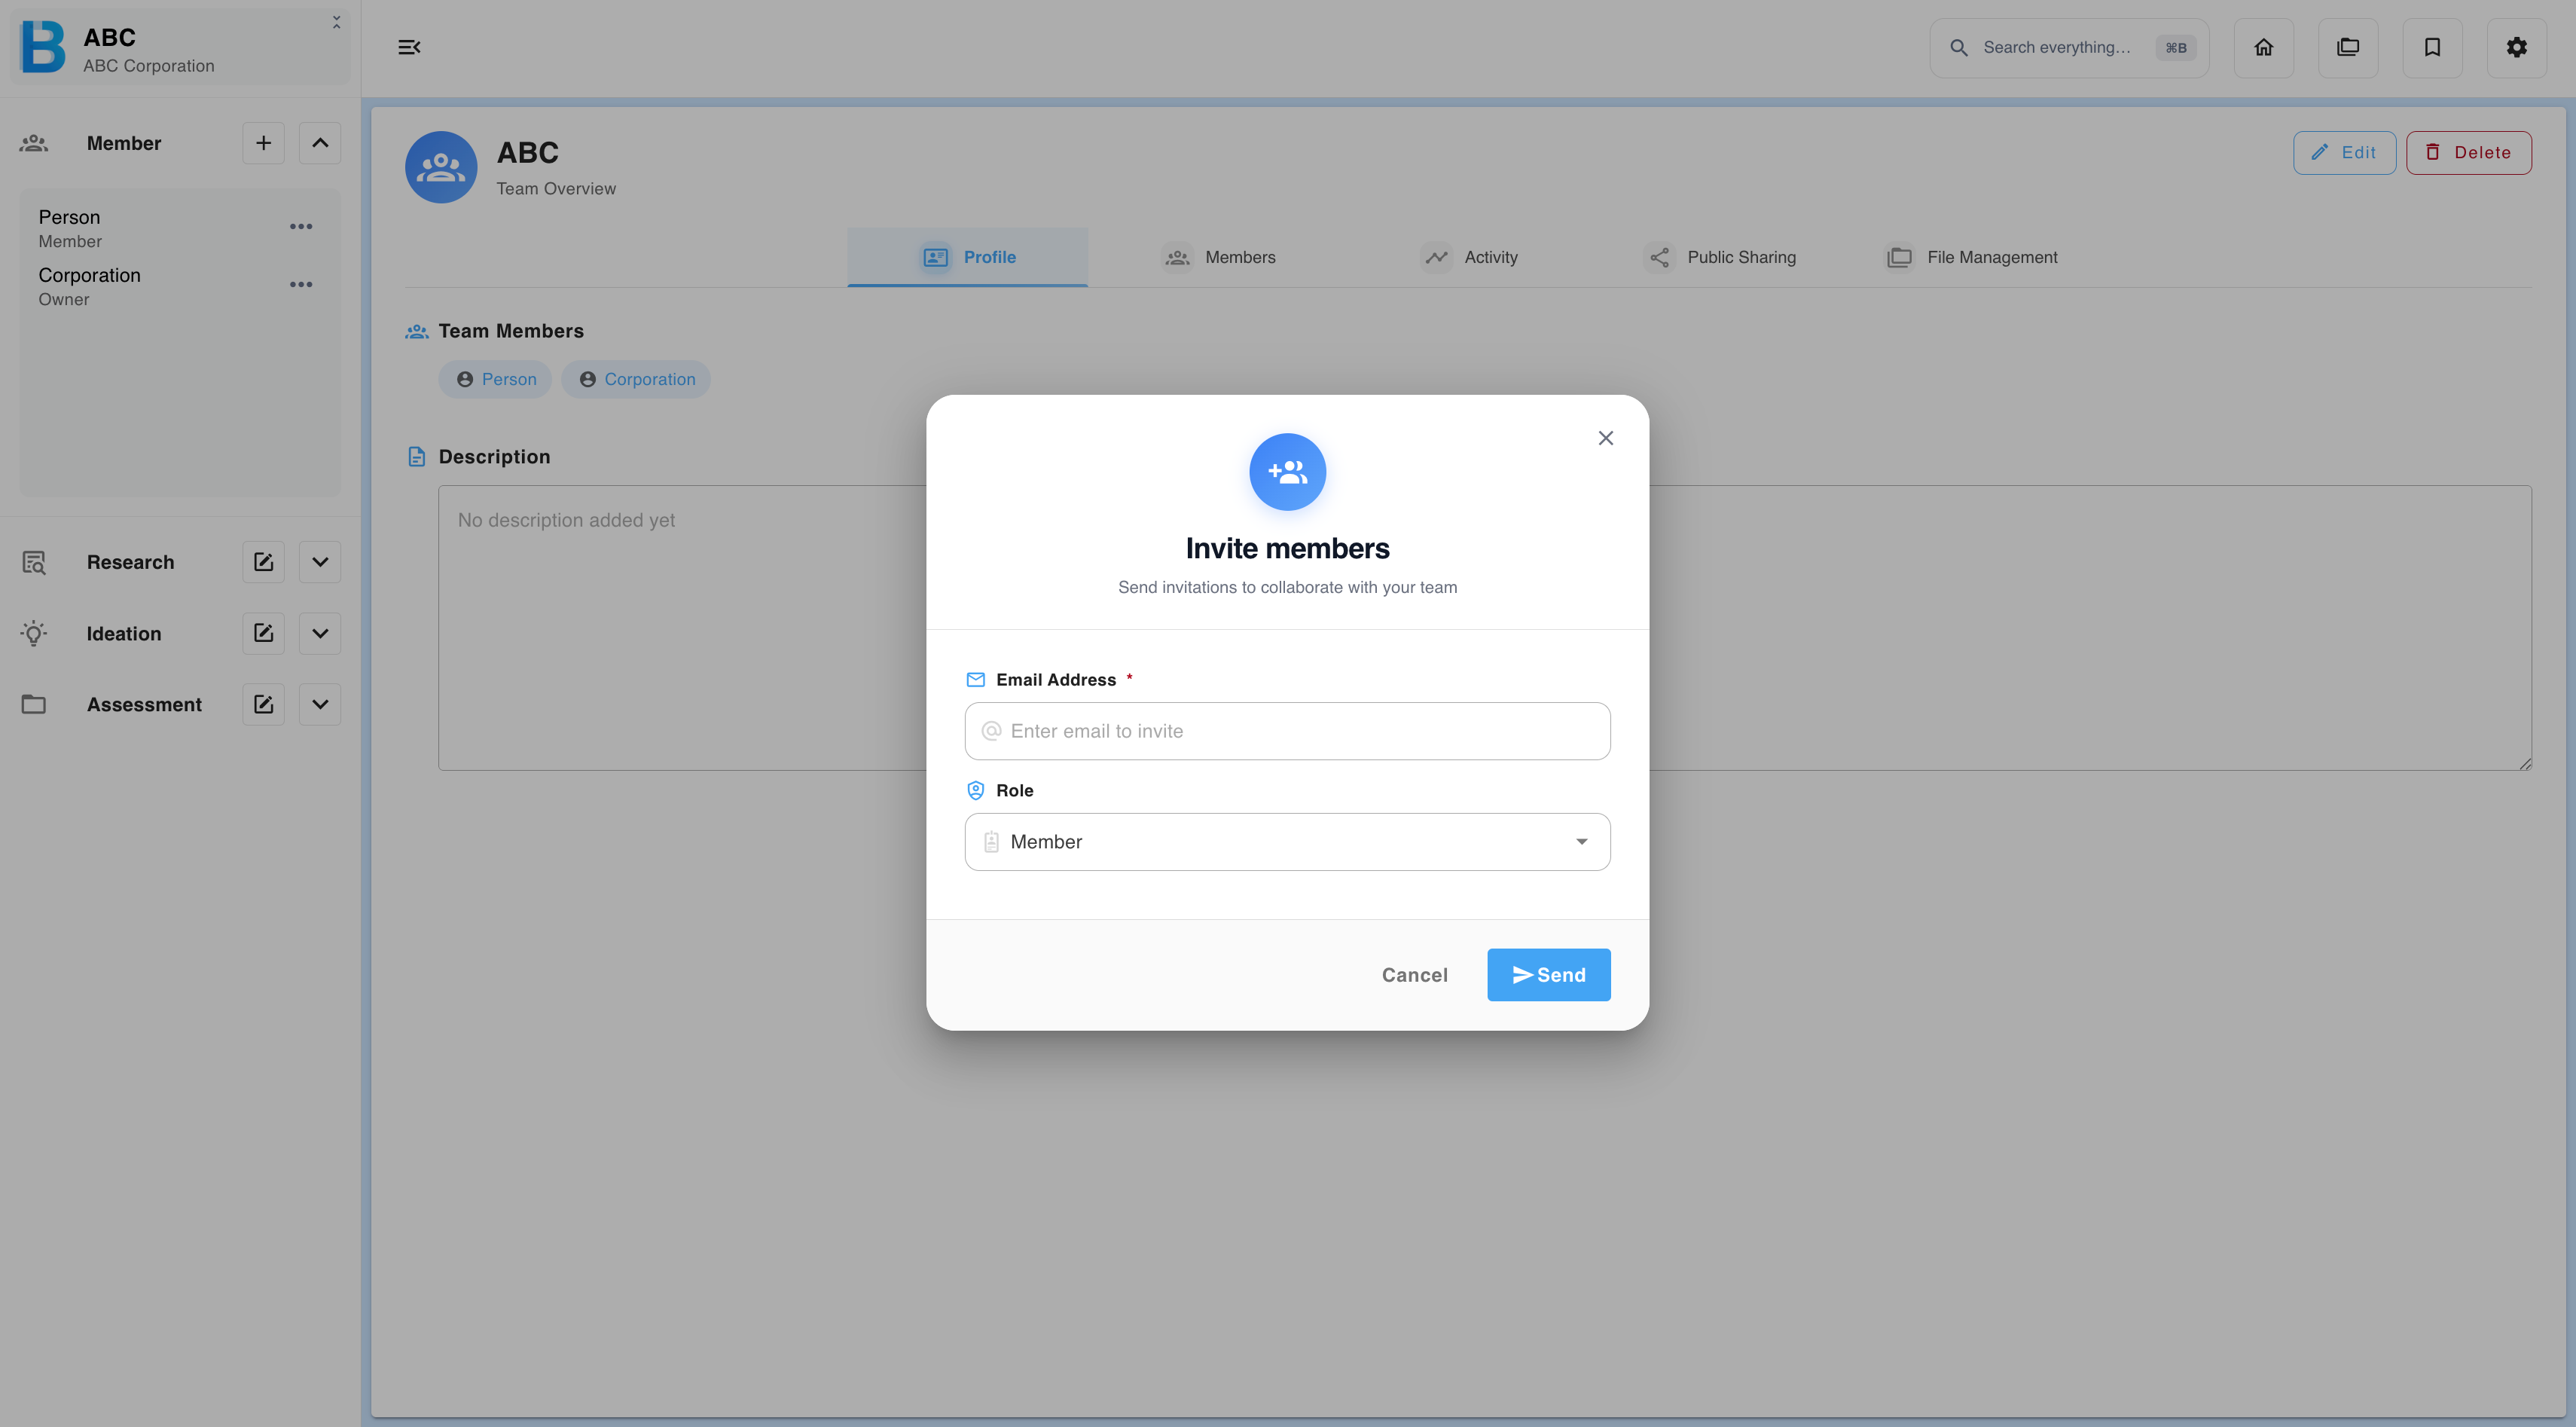
Sending an invitation
Step 1 — Open the invite dialog
Check you are viewing the group you want to add the person to, then open Invite members.
Step 2 — Enter the email address
Enter the person's work email address. An address outside an approved domain is rejected.
The person does not need a BIIM account yet. If they have not registered, the invitation waits for them — once they create an account with that address and sign in, it appears in their notifications.
Invitations are sent one at a time. To invite several people, send one, then repeat.
Step 3 — Choose a role
Select Member or Guest from the Role list. Members are selected by default. You can change someone's role later, so this is not a permanent decision — see Roles and Permissions.
Step 4 — Send
Select Send, or Cancel to close without inviting anyone.
The invitation then appears under Pending Invitations in the same dialog with a Pending label. The number beside the heading shows how many are outstanding.
How long an invitation lasts
Invitations do not expire. A pending invitation stays in the list until one of three things happens:
- The person accepts it, and moves to the member list.
- The person declines it.
- The owner withdraws it.
Withdrawing an invitation
Select the bin icon next to a pending invitation to withdraw it. Once the person has accepted, they move to the member list and you manage them from there instead.
Accepting an invitation
When someone invites you, a notification badge appears on the Settings icon in the top right of the screen.
- Select the Settings icon to open your notifications.
- Find the invitation in the list.
- Select the green tick to accept, or the red cross to decline.
Accepting adds the group to your group menu. See Switch Groups.
Public sharing permission
Public sharing is owner-only by default. On the member profile screen, the owner can switch it on for individual members, allowing them to create external share links.
Owners can audit every link that has been created from the Public sharing tab. See Public Sharing and Group Administration.